The Windows 10 operating system has options for adjusting the transparency of windows. Usually, the effect is activated by default and can be seen in the Start menu, Action Center, at the borders of application windows, and on the taskbar.
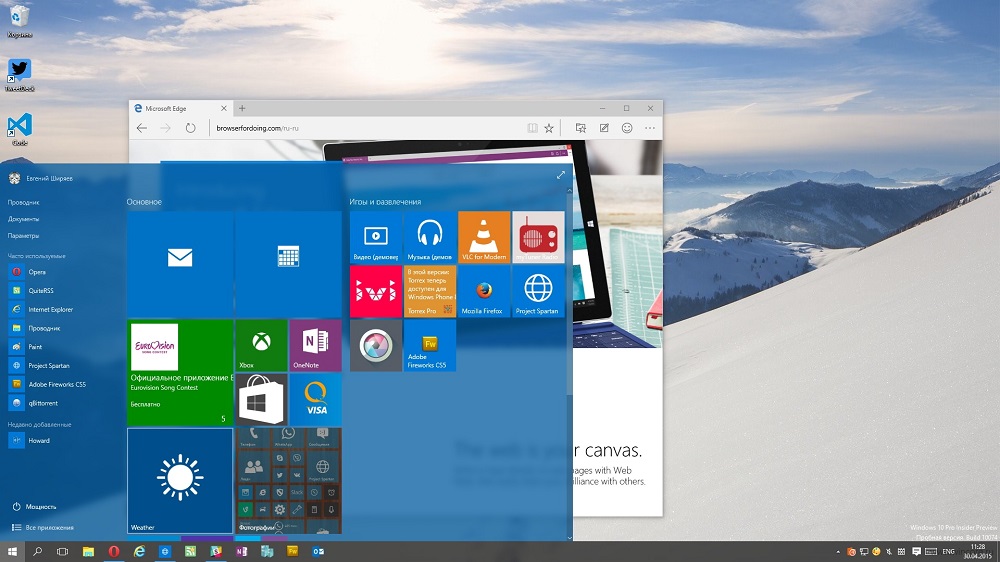
Here’s how to turn transparency on or off in Windows 10.
How to make the Start menu and taskbar transparent
With the help of a compact and convenient application for regulating system settings, added in the new Windows 10 operating system, you can make the taskbar transparent in a few clicks or apply such a special effect to the Start menu.
Windows does not offer a variety of settings for this function, so without installing third-party software, you will have to be content with what the system offers. If you are using the standard graphics driver for your video card (“Base Video Adapter” in the Device Manager list), you will not be able to use this accessibility feature. Check for an installed and updated driver on your system before following the instructions in the manual.

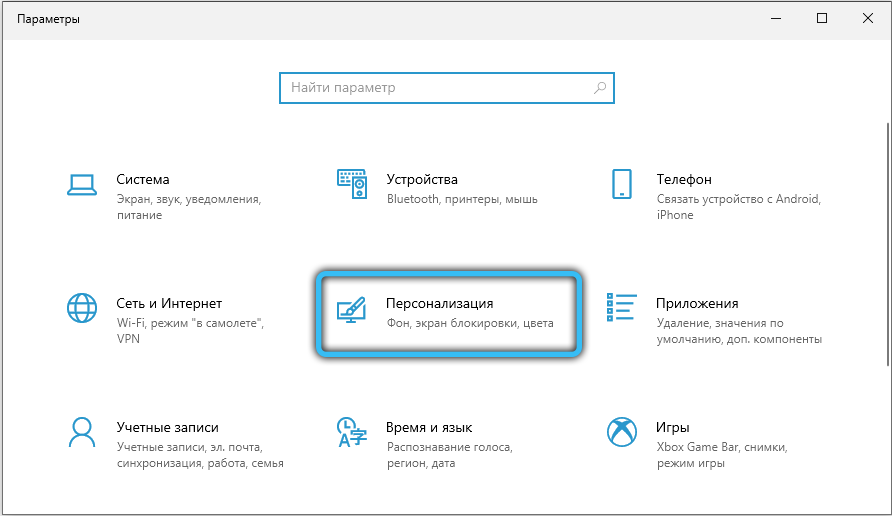
To set the transparency effect, go to Windows Settings using the Win + I keyboard shortcut. You can also get to this section through the Start menu by clicking on the button with the gear icon. Now you need to use a simple algorithm of actions:
- Select Personalization from the list.
- Click on the Colors category on the left side of the window, then activate / deactivate the Transparency Effects option.
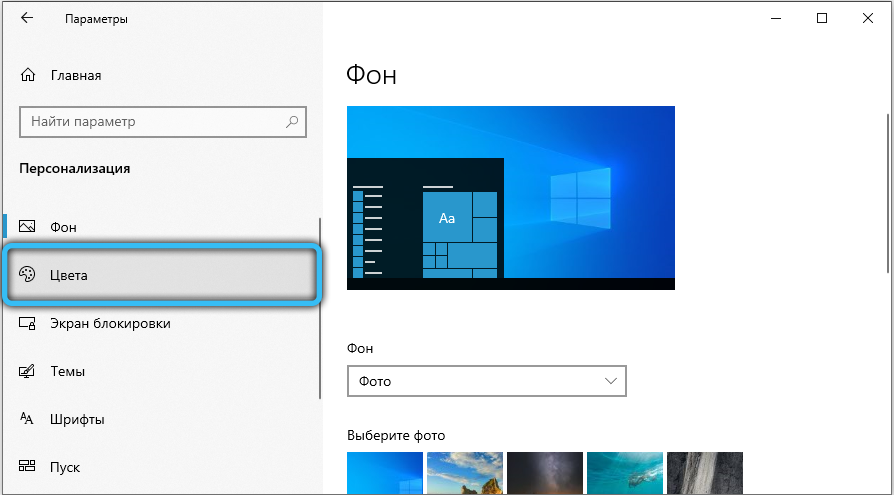
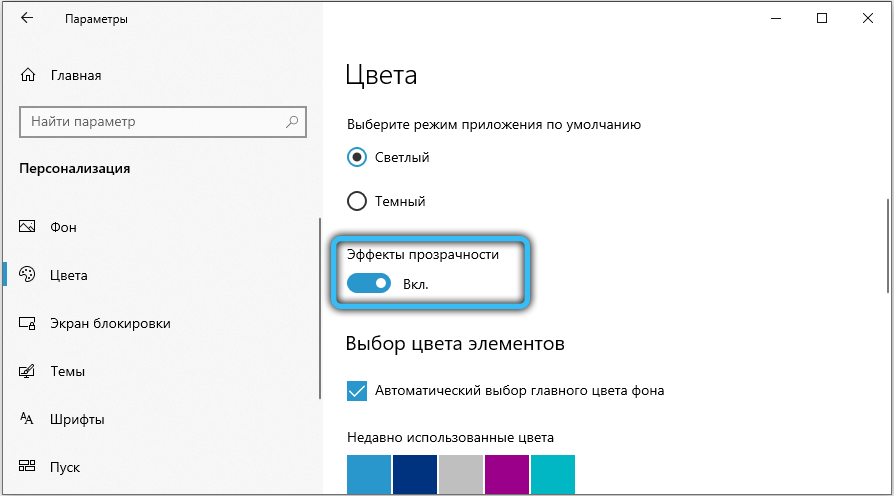
- Now the individual windows and panels will become slightly transparent. The intensity of the special effect cannot be changed with the built-in means of the OS, therefore, to realize such a desire, you will have to use third-party software.
A similar result is obtained by changing the option through the “Registry Editor”:
- Use the combination “Win + R” to open the service window for invoking programs.
- Enter the query “regedit.exe” and click OK.
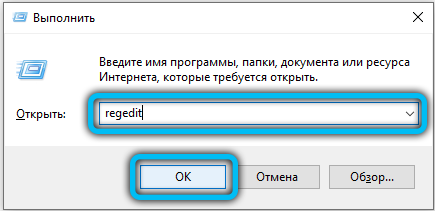
- Use the left pane to navigate through the registry directories:
HKEY_CURRENT_USER -> Software -> Microsoft -> Windows -> CurrentVersion -> Themes -> Personalize.
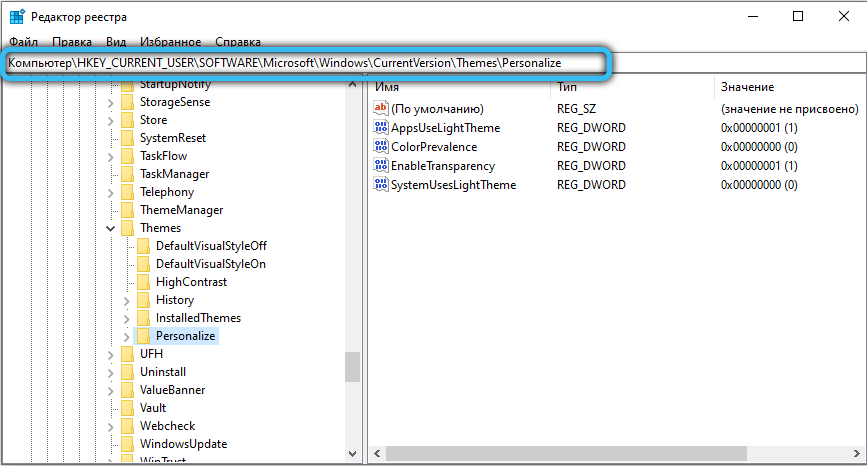
- Change the value of the “EnableTransparency” option to 0 to disable transparency, or to 1 to enable it.
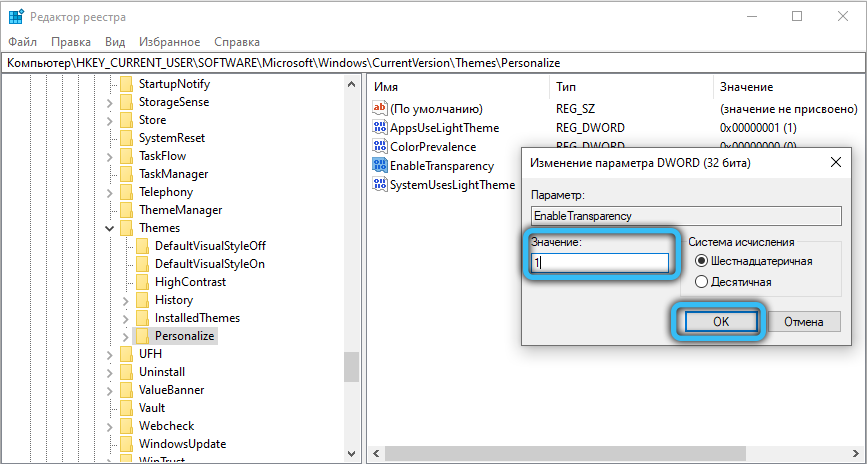
- Save changes by clicking on the OK button and pressing the F5 key.
This procedure can be simplified by creating a batch file with the .bat extension and writing a specific sequence of commands to it. Create a text document in a convenient place for you and open it, here you need to insert the first or second script, depending on the desired effect.
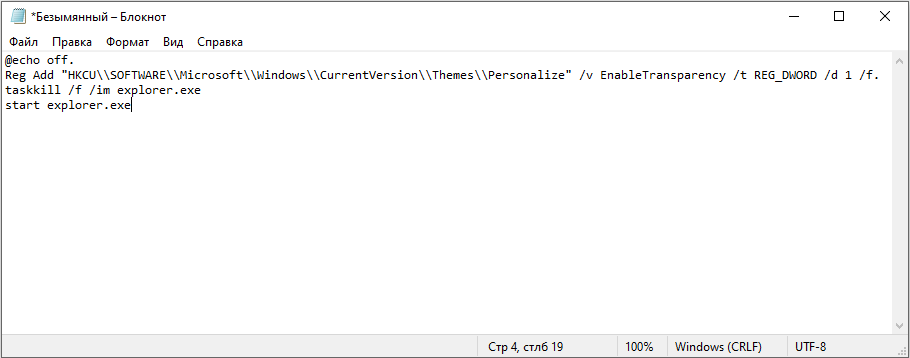
Insert the following text into the document table of contents to remove the transparency of windows and panels in Windows:
@echo off.Reg Add “HKCU \ SOFTWARE \ Microsoft \ Windows \ CurrentVersion \ Themes \ Personalize” / v EnableTransparency / t REG_DWORD / d 0 / f.
taskkill / f / im explorer.exe
start explorer.exe
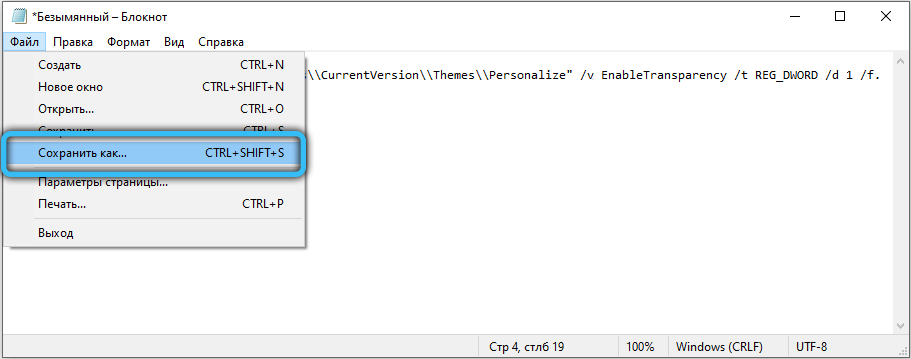
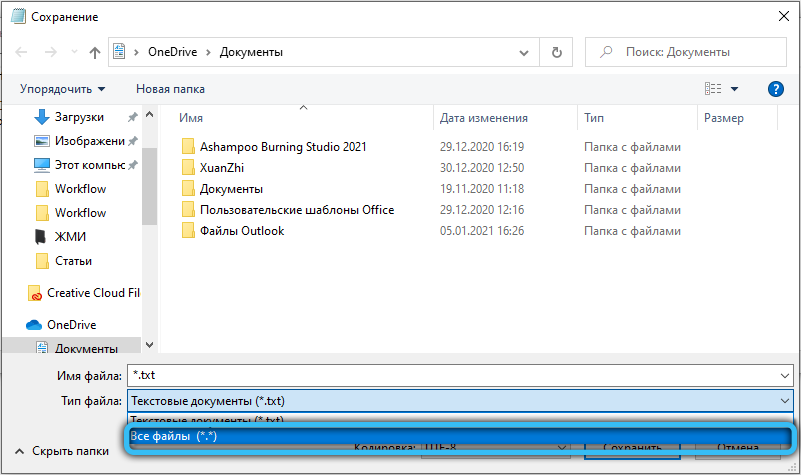
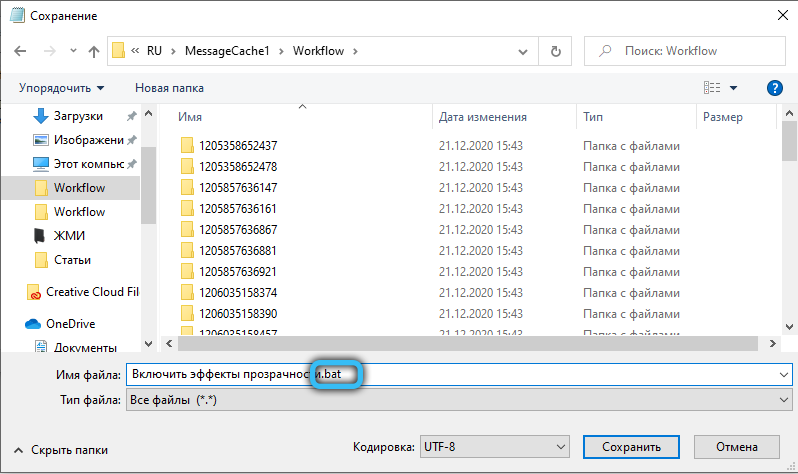
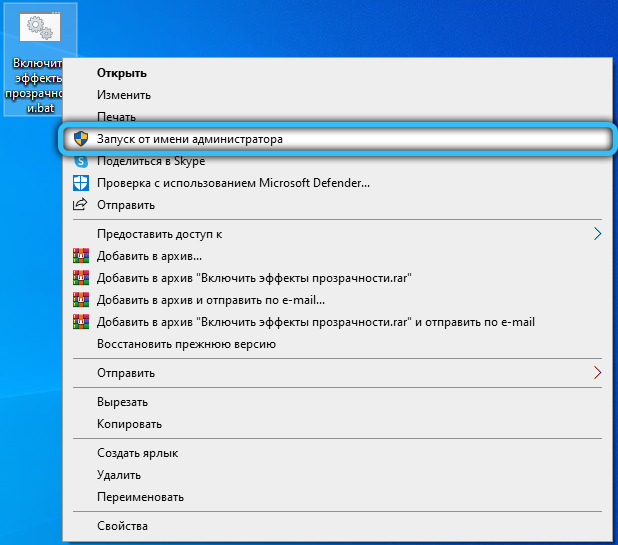
To apply the effect, you need to create a .bat file with the following content:
@echo off.Reg Add “HKCU \ SOFTWARE \ Microsoft \ Windows \ CurrentVersion \ Themes \ Personalize” / v EnableTransparency / t REG_DWORD / d 1 / f.
taskkill / f / im explorer.exe
start explorer.exe
Increase the transparency level of the taskbar
After the effect has been enabled, those wishing to slightly increase the intensity of its work can make additional edits to the registry. To do this, follow a simple algorithm:
- Right-click on the desktop and select Personalize.
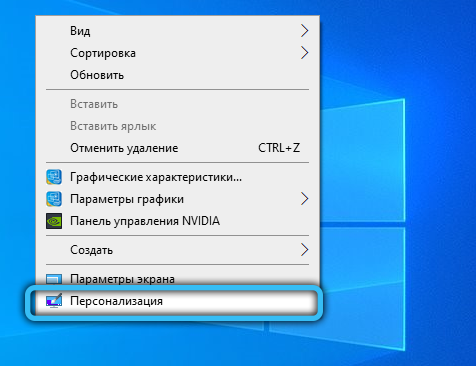
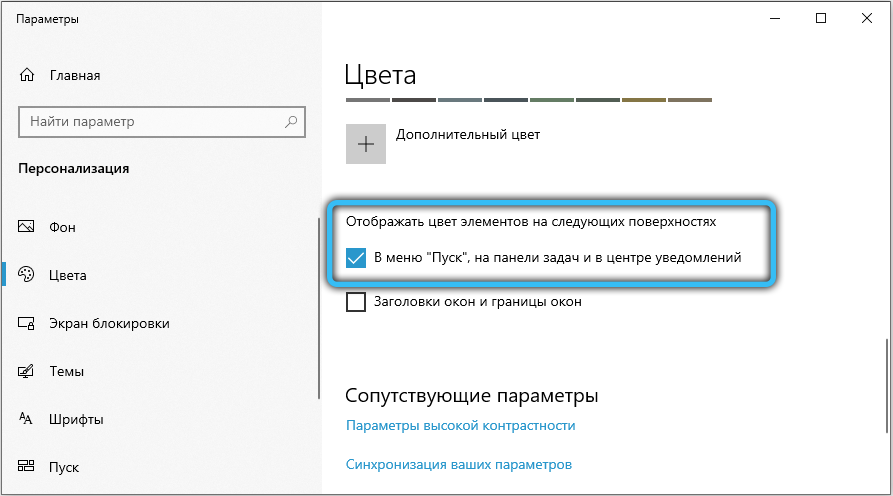
- Go to “Colors”, in the category of options “Display the color of elements on the following surfaces” there should be a check mark opposite “On the Start menu, on the taskbar.”
- Start the Registry Editor by calling it with the Win + R combination with the request “regedit.exe”.
- Follow the following path in the registry:
HKEY_LOCAL_MACHINE -> SOFTWARE -> Microsoft -> Windows -> CurrentVersion -> Explorer -> Advanced.
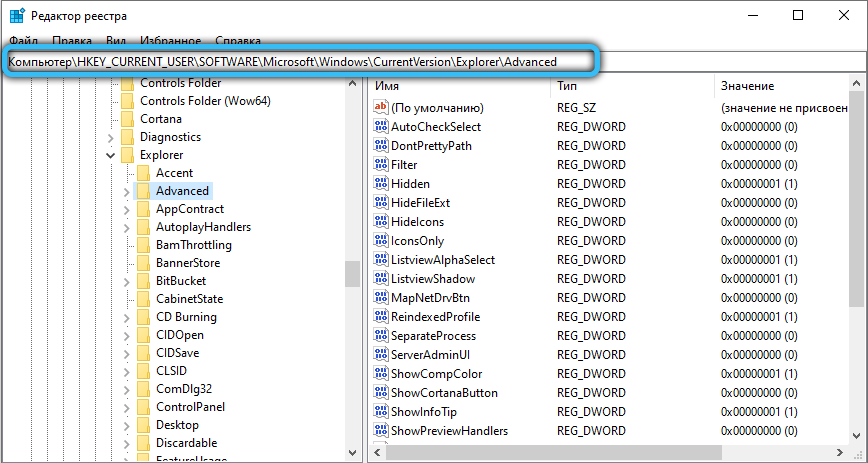
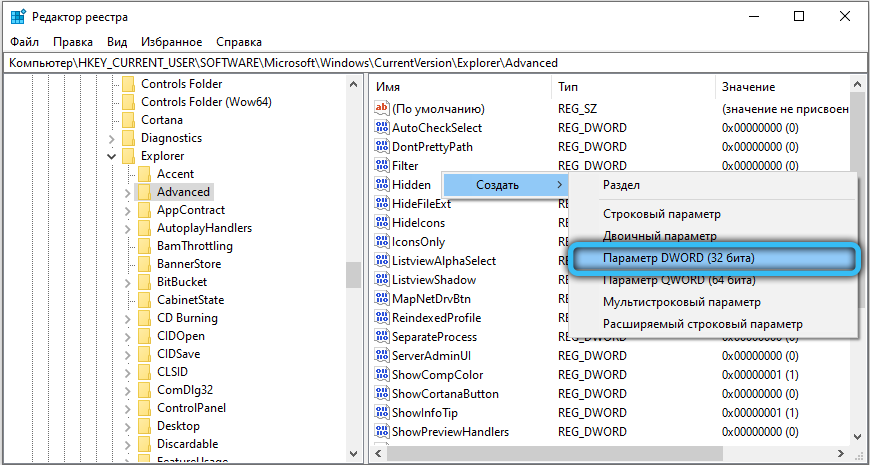
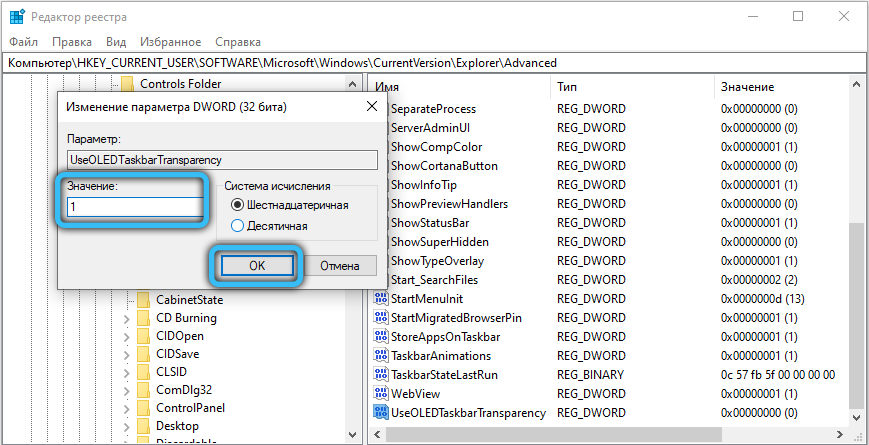
- There are several parameters here, you need to create a new one. To do this, right-click on an empty area on the right side of the window and select “New” -> “DWORD Parameter (32 bit)”. Name it “UseOLEDTaskbarTransparency”, then open the created parameter and enter the value 1. Click OK and refresh the registry by pressing Enter.
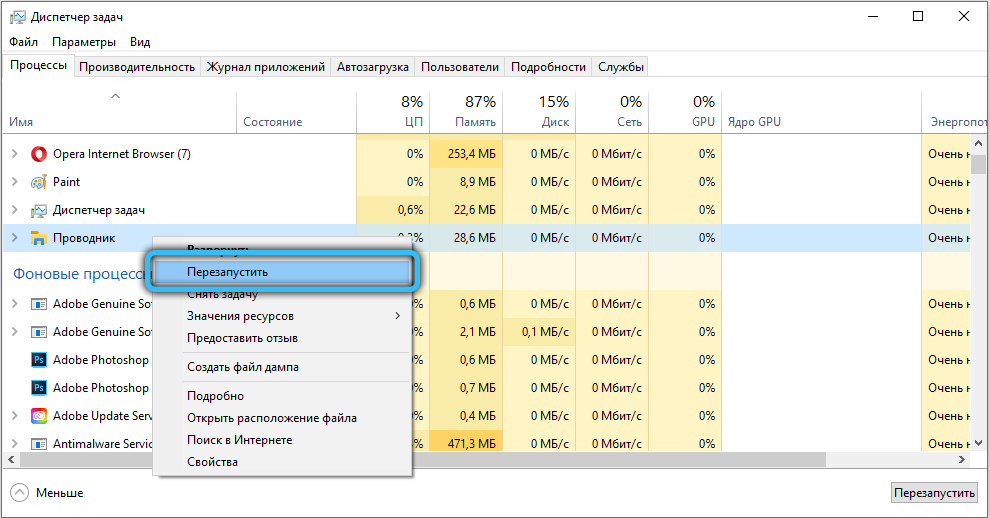
- In order to apply the changes, you need to log out of your account and log in again, or restart the explorer. Use the keyboard shortcut “Ctrl + Shift + Escape” to quickly open the Task Manager. In the “Processes” tab, under the “Applications” category, there is an Explorer process, right-click on it and select “Restart”.
Now you figured out how to make the bottom panel in Windows 10 and other system elements transparent.
Adjusting window transparency
The standard features of the OS only allow you to activate / deactivate the transparent windows function in Windows 10, to gain access to advanced functionality, as well as the ability to adjust the level of transparency and blur, you need to use third-party utilities.
We recommend downloading the Aero Glass program, which is a glass effect and also returns the transparency that was present in early Windows operating systems. In Windows 7, Aero Glass was a separate personalization theme that came with the OS.
Once installed, you can change the intensity of the effect in the “Personalization” section. Use a simple guide to use the Aero Glass tools:
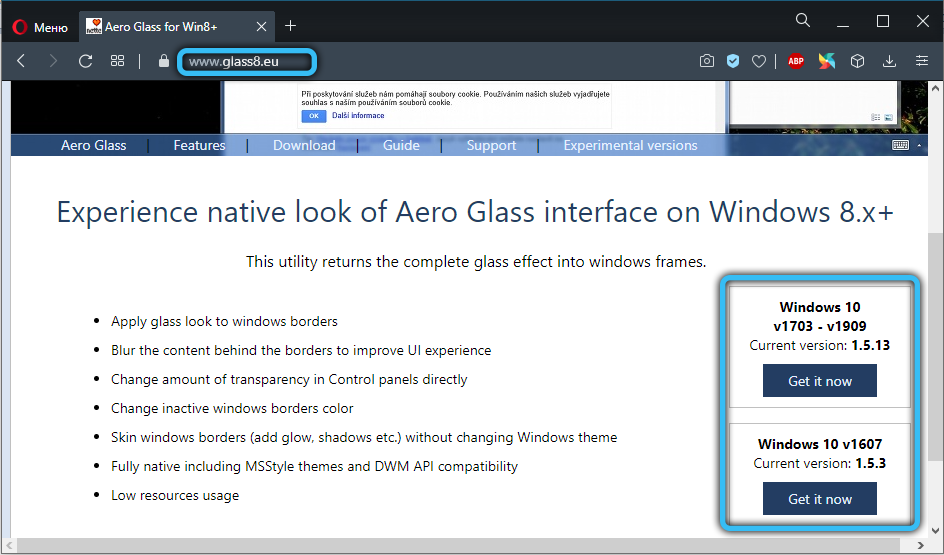
- Download the utility from the official website (http://www.glass8.eu), select the Installer package (32-bit + 64-bit Win) to download.
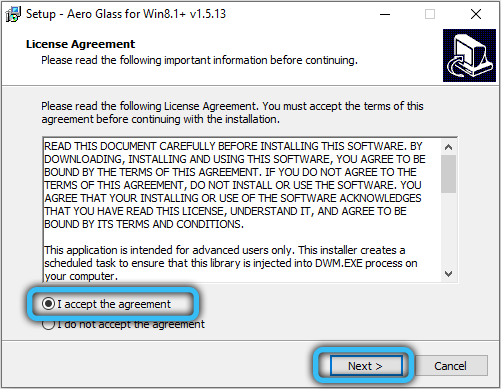
- Run the installation distribution, accept the license agreement (by checking the box next to “I accept the agreement”, then click on the “Next” button.
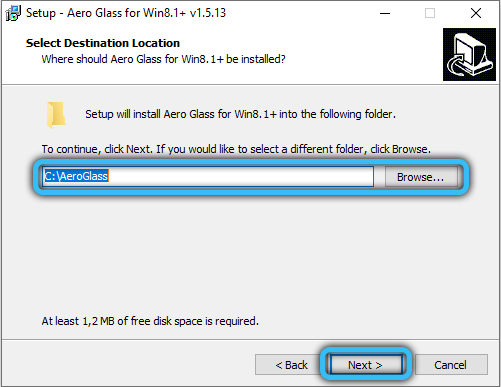
- Now you need to specify the path where the program files will be unpacked and installed. By default, the root of the C drive is selected.
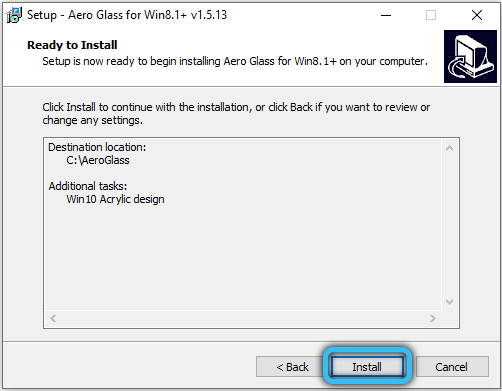
- Wait until the installation is complete, after which the transparency effect will manifest itself in full glory in your system.
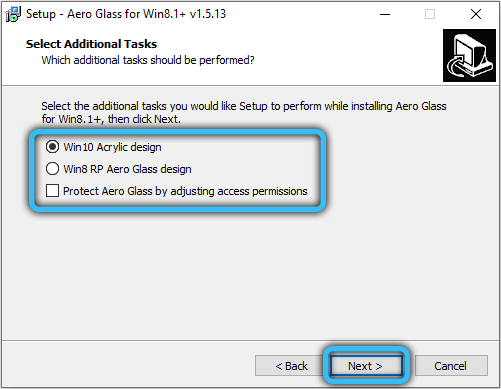
To adjust the degree of blurring of window borders, as well as change the color of “glass” interface elements, go to the personalization section through the context menu on the desktop. Right-click anywhere on the desktop and select Personalize.
In the left menu, select the “Colors” subsection, then change the coloring and transparency settings using the standard settings offered by the system. It is also important to know how to turn off the effect, this procedure does not take much time.
Deactivation is performed by uninstalling the Aero Glass program. For example, this can be done through the “Programs and Features” section, by selecting the name of the application in the list of installed software and clicking on the “Remove” button.
Now you can control the transparency of windows, Start menu, Action Center and other system elements. However, the effect cannot be applied if the video card drivers are not installed, so make sure you have them on your computer. If you have any questions, write them in the comments using the special form below.