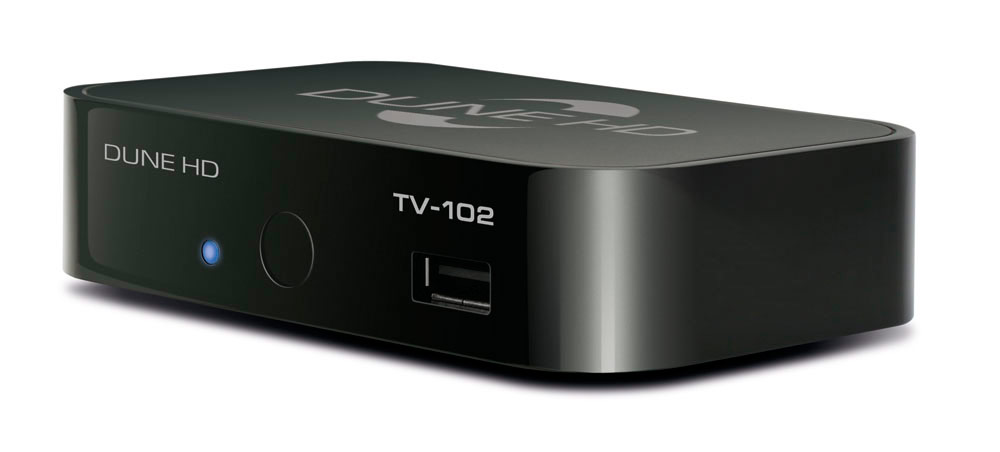
Long before the advent of Smart TV, the question arose about expanding the functions of TVs. The widespread proliferation of digital formats, including video, has forced many vendors to start developing universal devices that can reproduce such digital content. Later, such media players acquired the ability to access the World Wide Web, and their current descendants even turn an ordinary TV into a device that is not inferior in its capabilities to a smartphone.

Yes, and the TVs themselves are not what they were before, but the difference in the cost of Smart TV and a media player is simply huge, so the latter will not leave the scene very soon. Not everyone has the opportunity to purchase a new TV set for fabulous money, if the old one can also significantly expand the functionality by purchasing an inexpensive device. Such as Dune HD.
Contents
How to connect a media player to the Internet
In principle, you do not need an Internet connection to watch movies downloaded on a computer, and Dune HD is positioned as an omnivorous device that can understand almost all modern video file formats. But who will refuse the possibilities provided by the set-top box – for example, watching streaming video from online cinemas, since the current speeds allow it?
Note that there may be several options for accessing the network. Let’s consider them in more detail.
How to connect Dune HD directly to your computer
So, we have a computer connected to the Internet. To provide this possibility for a media player, both devices must be connected with an Ethernet network cable and then performed a series of manipulations that allow them to see each other. The algorithm for connecting Dune HD via a LAN cable begins with setting up the computer.
Actions on PC:
- through the “Control Panel” launch “Network Connections”;
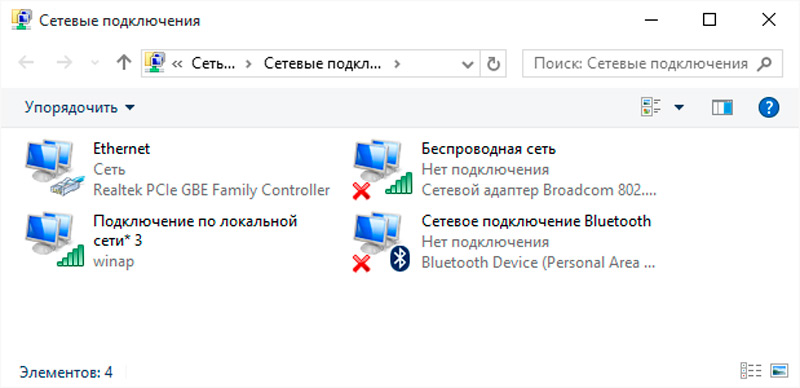
- in the proposed list we are interested in the “Local Area Connection” option;
- right-click on it, in the context menu that opens, select the “Properties” item;
- click on the “Network” tab;
- right click on the option “Internet Protocol IPv4” and select the item “Properties”;
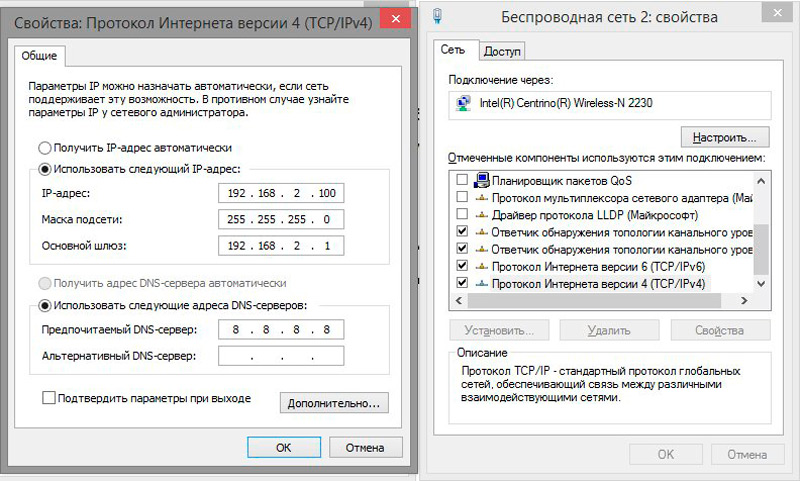
- check the box next to the phrase “Use the following IP address”;
- in the IP-address field, enter the value 192.168.1.2;
- enter 255.255.255.0 in the “Subnet mask” field;
- as the main gateway, specify the address 192.168.1.1;
- we confirm the changes made by clicking OK.
We perform a similar operation to connect Dune HD to a computer on a set-top box:
- click on the “Menu” button on the remote control;
- select “Settings”;
- go to the “Network” submenu;
- in the “Mode” section, select the “Manual” line;
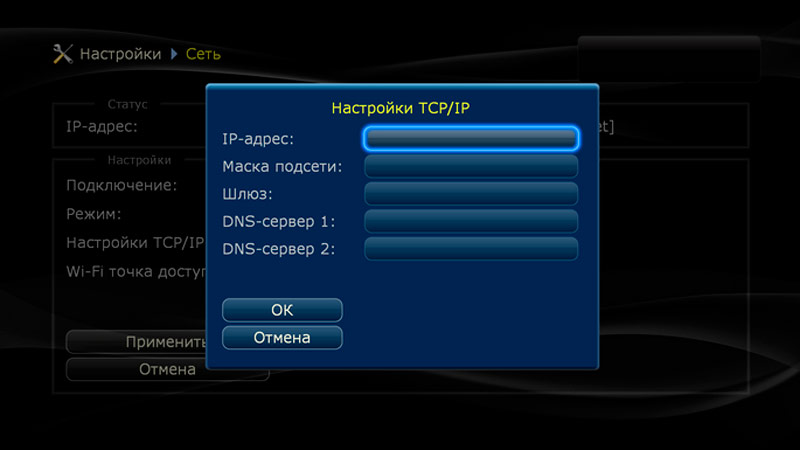
- enter the value 192.168.1.3 in the IP-address field;
- enter 255.255.255.0 in the “Subnet mask” field;
- as the main gateway (DNS-server-1), specify the address 192.168.1.1;
- click OK;
- go to the “Applications” section from the settings;
- select “SMB server”;
- in the “Working group” field, change the value to WORKGROUP (by default, you can enter your own group, if it exists and is used).
Today, this method of connection is exotic, since most families connect to the Internet through a router. To ensure the best speed and reliability of the connection between the player and the router, you should give preference to a wired connection.
Dune HD TV wired to router via PPPoE
The easiest way. It is enough just to connect the devices with an Ethernet cable, the media player must connect to the network itself. To check the connection status, go to the STB settings. With the section “Network”. Here in the “Status” section, if everything is fine, the IP address should be displayed, as well as the inscription “Connected”.
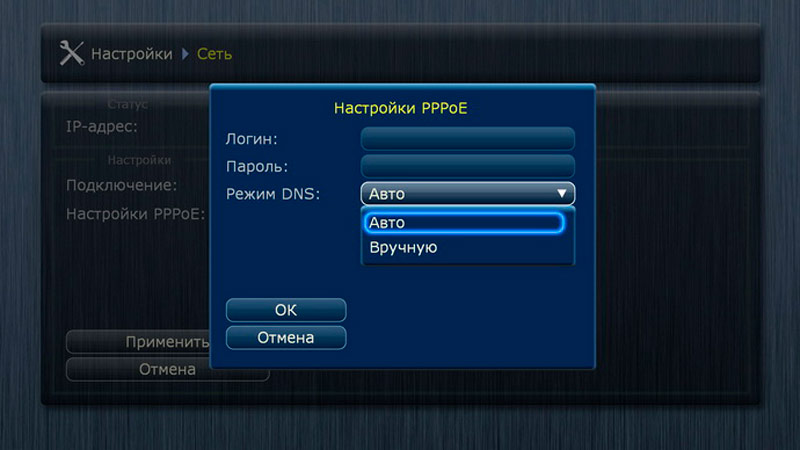
If you see the status “Disabled” – check if the cable is connected correctly (a common cause of a malfunction is an error with its strapping). You can test the functionality of the patchcord on another device, such as a laptop. If the cable is in order, you can sin on a non-working port on the Dune HD or router.
If the status is “Connected”, but the IP-address field instead of numbers contains the inscription “not set”, you need to look at the router settings (the wrong connection type may have been set).
Dune HD wireless connection to a router via Wi-Fi
Connecting Dune HD over the air should also be easy:
- go to the settings from the remote control;
- select the “Network” tab;
- click on the “Wireless” line in the “Connection” section;
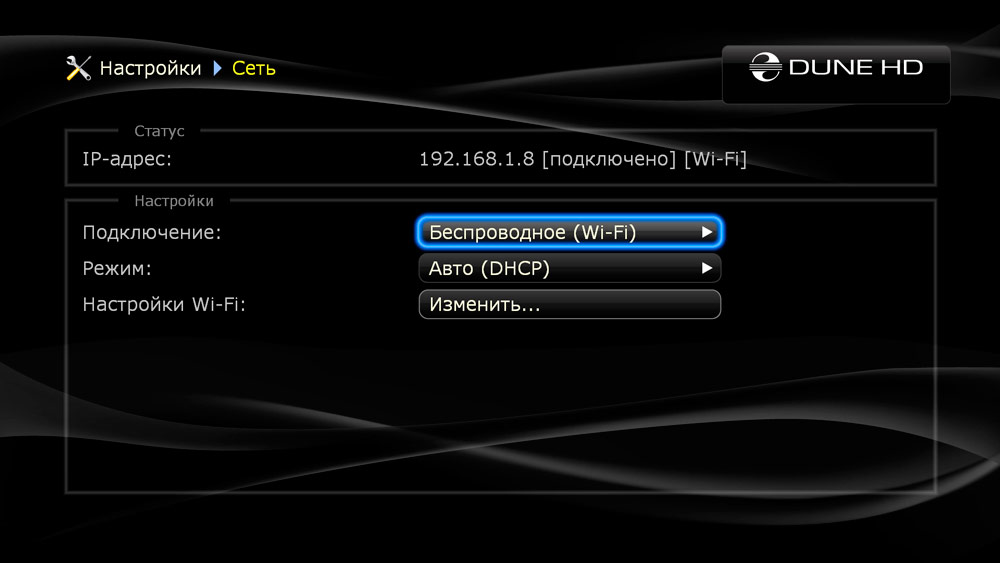
- if the media player does not detect the connected equipment – most likely, you are using an adapter incompatible with Dune HD WiFi;
- if everything is in order with the adapter, a search for networks will be automatically launched, among which you will need to select your home network and enter a password;
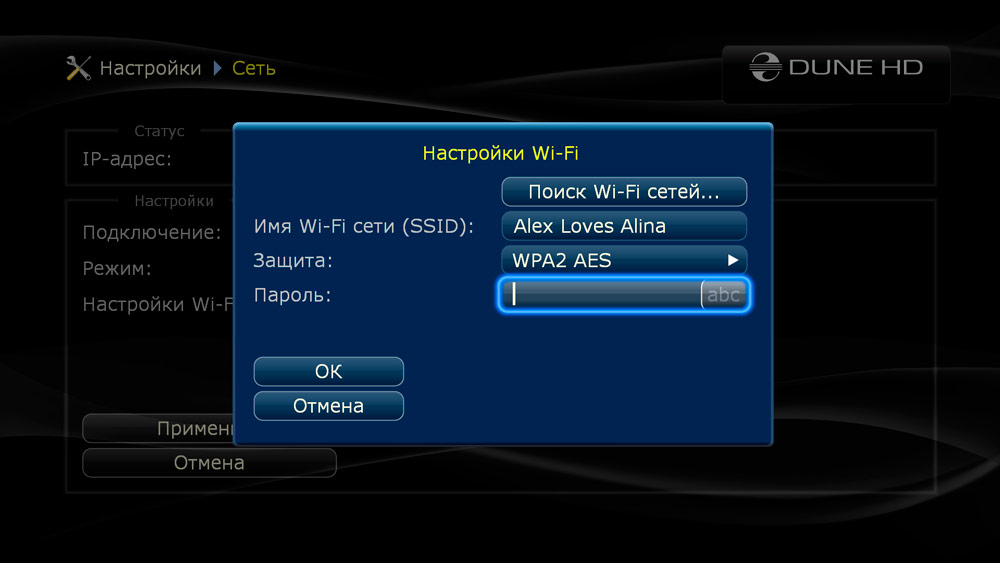
- clicking OK will complete the procedure, as a result of which the device will be assigned its own IP address.
If the IP address remains empty, you may need to change the encryption type to WEP64 HEX (this is important if the password contains numbers in addition to letters).
Setting up the media player
Now let’s take a look at the basic media player settings to help you get the best viewing experience and usability.
Changing the interface language
It is impossible to say in advance what language will be set in the STB by default. It is quite easy to change it by changing the current value in the list of available languages to the required one. Access to the option: “Settings” – “General” – “Interface language”.
Change the screen saver
Here you can also delete the screen saver or change the delay time for its appearance on the screen (indicated in minutes).
Changing the current time
Dune HD has a built-in clock that may initially show the wrong time. Time settings can get lost during operation. To restore them, you need to select the “Date and Time” item in the settings and select your time zone. If you do not know exactly what time zone you live in, be guided by the time indicated in brackets.
Changing the video mode settings
Let’s talk first about the “blind” method. It will have to be used if, when you first turn on the set-top box or later, you accidentally chose an unsuitable video mode, as a result of which the image on the TV screen disappeared, so it is no longer possible to use the usual method through the menu.
In this case, we do this:
- press the Mode button on the remote control;
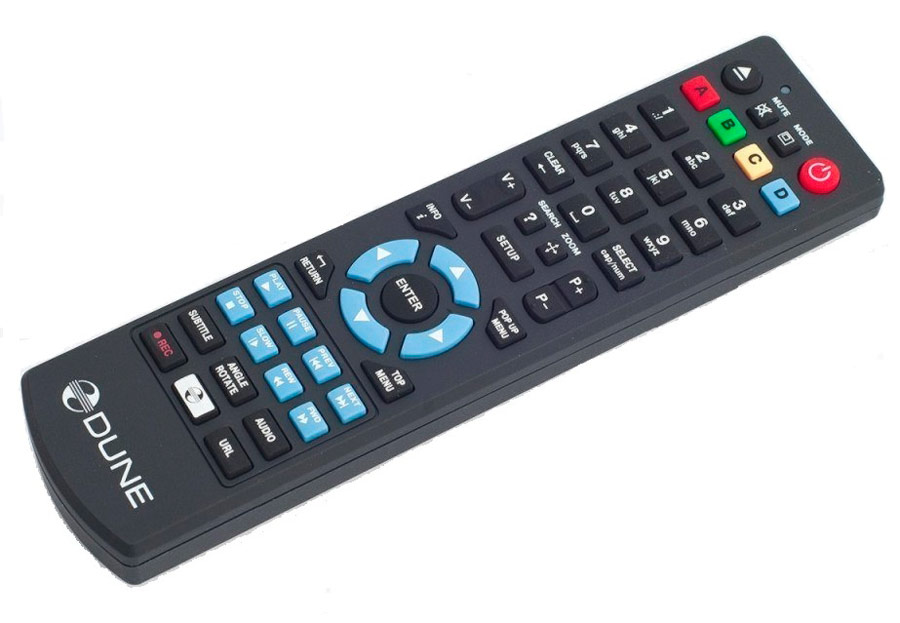
- if the LED on the panel of the media player blinked, go ahead – press in turn the numbers from 0 to 5. Each of them is responsible for a certain video mode. If, as a result, an image appears, you can go to the settings with the remote control, remembering which mode is supported exactly. List of video modes supported by Dune HD:
- 0 – 1080p @ 60 Hz;
- 1 – 480i 60Hz (analog, NTSC);
- 2 – 576i 50Hz (analog, PAL);
- 3 – 480i 40 Hz;
- 4 – 720p 60 Hz;
- 5 – 1080i 60Hz.
To use the usual method, you need to select the “Video” item in the settings and already in this section change the values of the “Video output” and “Video mode” parameters.
Here you can change the aspect ratio if the current one does not suit you, as well as the frame rate (when you switch this parameter, the image may disappear for a few seconds).
Changing the way the volume indicator is displayed
There are two options here: in percent and in decibels. The latter method is not very informative for most users, therefore, preference should be given to the classic method. Sound settings are located in the “Audio” tab.
How to use the media player
Consider what Dune HD TV offers to its owners.
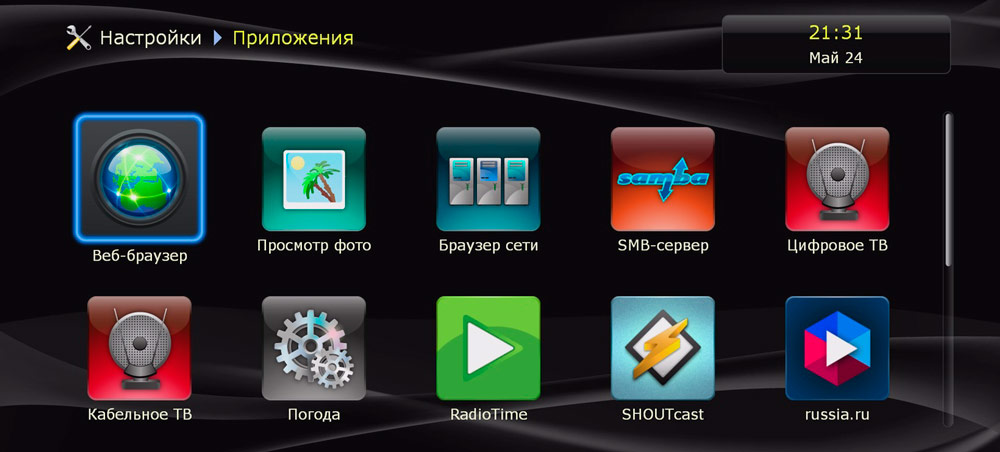
We have already partially considered the item of the main menu “Settings”, if you wish, you can familiarize yourself with it in more detail. It has nothing to do with functionality, except for the “Applications” option, where you need to specify the parameters of services and services that require Internet access (built-in browser, IPTV, radio).
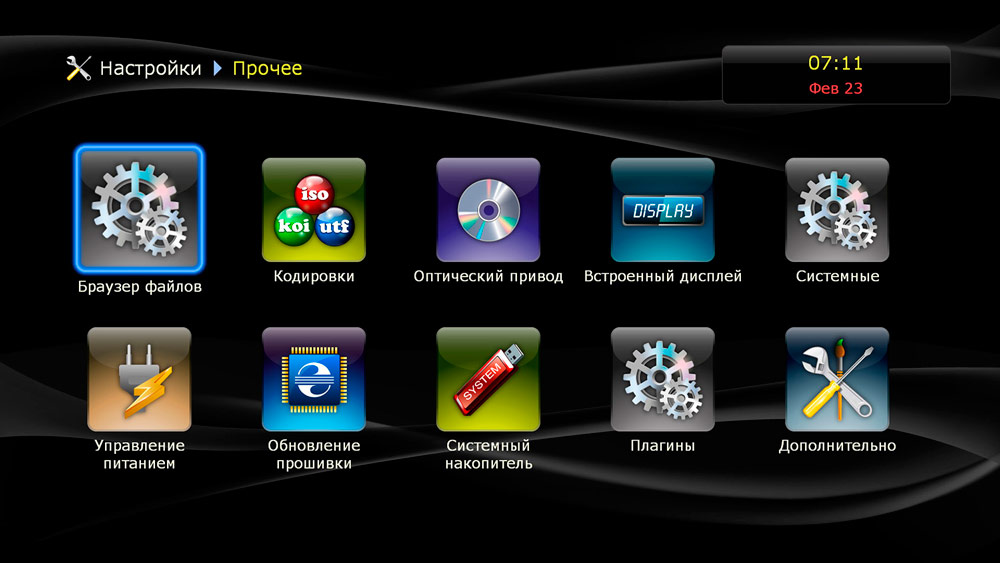
The “Applications” item is also in the main menu, it is from here that you can launch popular streaming resources for watching streaming video (ivi.ru, vidimax, megogo, etc.).
In the “Favorites” item of the main menu, you can save links to folders / files to ensure their quick search.
How to play media files (offline, local content)
The set-top box understands most of the formats of modern media files, including the latest codecs and containers.
To watch the video, you can use external media such as flash drives or portable drives, if there is a connection with a computer via a local network, then the video can be played from network folders (using DLNA, SMB or NFS). For this type of content sources, there will be no restrictions on the data transfer rate – all these options will easily provide playback of Full HD quality files that require a bitrate of about 50 Mb / s.
Although there is only one USB port on the set-top box, it supports the operation of USB hubs, so if one port is not enough for you, you can easily bypass this limitation. The device supports external drives formatted with FAT32, EXT2 / 3, NTFS and even HFS / HFS + file systems.
A distinctive feature of Dune HD is the ability to play files directly from disc images, while providing full support for DVD images, and partial support for BD images. But the light version is also capable of a lot: there is timecode navigation, you can also navigate by chapters, enable / disable display of subtitles, select an audio track.
The video player itself is also implemented very solidly, it has everything you need for comfortable viewing: rewind, turn on subtitles, select an audio track, navigate through chapters, as well as timestamps. There is a function of time synchronization, the ability to change the frame size is implemented. The player’s status line displays basic information about the file being played – its name, bit rate, resolution, frame rate, codec used. As for the sound, you can see the language of the track, as well as the codec used.
When playing music, you can see the name of the song, if there are tags, it is also displayed. At the same time, the omnivorousness of the audio player is amazing. In addition to the demanded formats, he understands a number of specific ones – PCM, WV Pack, FLAC, Alac and APE (both multichannel and stereo). The technical capabilities are not the most outstanding, but the player reproduces 192 kHz with 24 bit encoding.
The image viewer understands JPG, BMP, PNG. There is a slideshow mode, in which you can set the time interval and indicate the transition from one frame to another.
How to use Internet resources
So we come to the most interesting part of the description. Although there is no possibility of self-installation of applications here, this is not a real media combine, the developers make sure that the multimedia capabilities of the set-top box are constantly expanding. This usually happens when a new version of the firmware is released, which is installed without the participation of the owner of the device.
Let’s take a look at how to use the most popular applications from the available list.
Vidimax
This is a paid video library with a huge selection of well-structured content, from movies to TV shows. Quality – not lower than DVD-Rip (now another designation is in use – WEBRip, WEB-DLRip), many files with HD resolution.

As for the payment options for video, there are two of them:
- unlimited (pay a certain amount per month and see everything without restrictions);
- payment for a separate file, which can be viewed an unlimited number of times during two days.
Newly registered users are provided with a free trial 15-day period. To view content through this application, you need an Internet connection with a speed of 2.5 Mb / s (DVD-Rip quality) and twice the speed for HD.
Ivi.ru
Another very popular paid online cinema. However, a considerable part of the film library is offered for viewing free of charge, but it is hardly worth counting on new items in this category. In addition, in this case, you will have to endure a considerable amount of advertising. To watch movies in HD quality, you need a high-speed Internet connection.
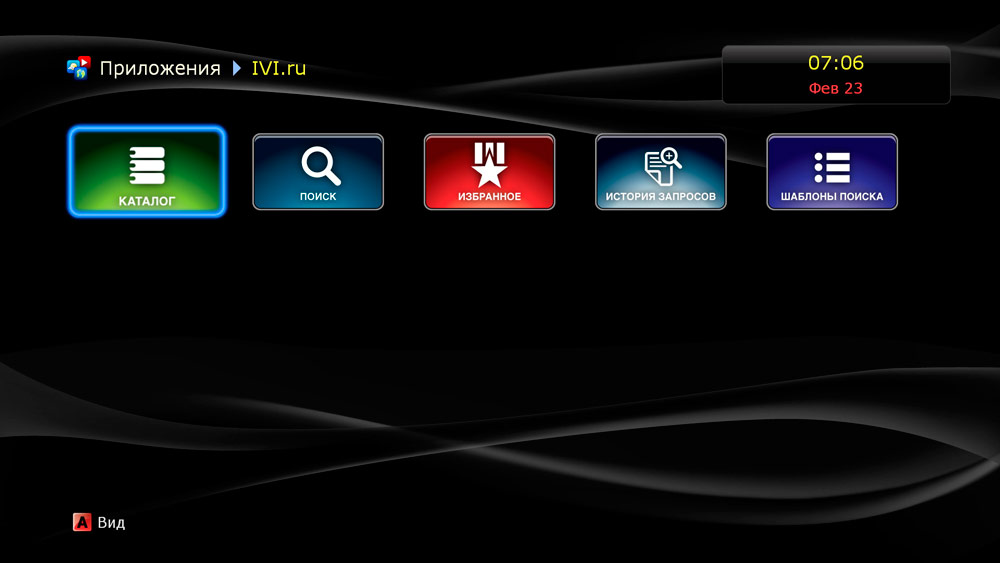
The application is quite simple to use. We launch it, make sure that the parameter “Show on the main screen” is activated (the value is “Auto” or “Yes”). If necessary, select the desired language for the cinema interface.
When you start Ivi.ru, you can use the STB’s remote control buttons to navigate the application menu as follows:
- arrows left / right, up / down – moving through catalogs, lists, between menu items;
- Return – return to the previous level;
- Enter – start the file for playback, enter the menu section.
When playing movies, the menu key assignments are as follows:
- Stop – stop playing, return to the directory;
- 0 – go to playing the file from the beginning;
- Info – view information about the file being played (file name, size, current position);
- Mode – selection of the playback mode (between high and low quality), the current position is set to zero;
- Url – during advertising, pressing this button will open the corresponding site, while watching the movie will be interrupted.
If the advertisement is played over the main picture, it is enough to press any button on the remote control to hide it.
Megogo
The third popular online cinema offering a variety of content on a paid and free basis.
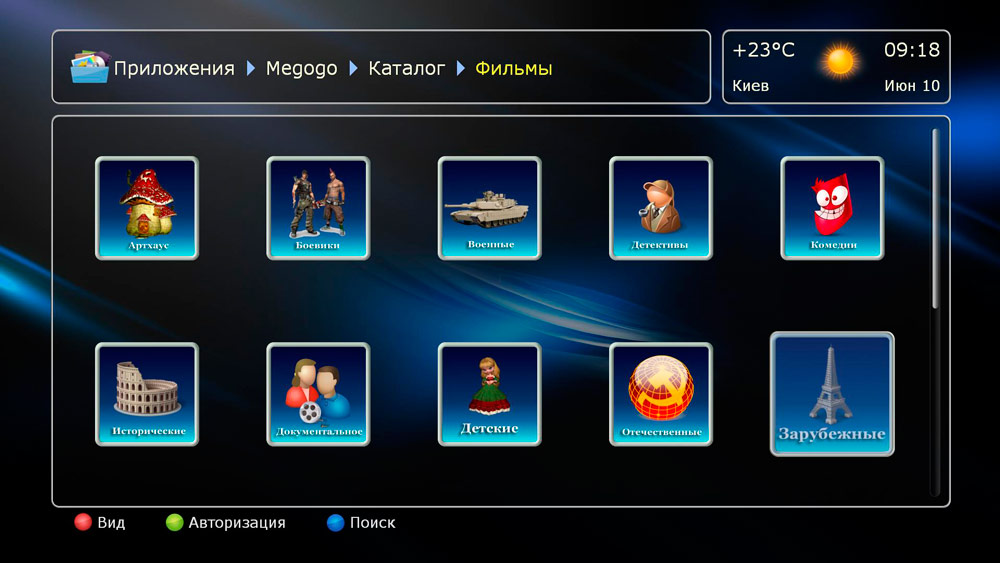
The service’s video library includes over 4 thousand films, more than 2 thousand cartoons, about a thousand TV series, a lot of entertainment content (shows, concerts). The catalog is updated almost daily. Most of the files can be watched for free, for a relatively small fee. New items from among the bestsellers are offered. There is a lot of advertising, you can get rid of it in the paid version.
Conclusion: Dune HD TV is a set-top box that does not have enough stars from the sky, but if you are an avid film lover and do not like watching movies on TV channels (today it is already bad manners), then this is an ideal choice for a TV of any class, including hopelessly outdated ones.