It is fair to say that most computers and laptops nowadays run on Windows operating systems. This could be the most current version of Windows 10, or Windows 8, Windows 7, and even XP and Vista, which are gradually losing their positions.

Any computer is a device equipped with a hard drive. It stores various information, including the operating system itself.
It would seem that everything can be loaded onto one disk, and nothing needs to be done. In fact, this is not entirely true.
Contents
If you open My Computer on most PCs and laptops, you will notice that they use at least 2 partitions. One of them is dedicated to the operating system and some software. And the second partition usually stores photos, videos, games and much more.
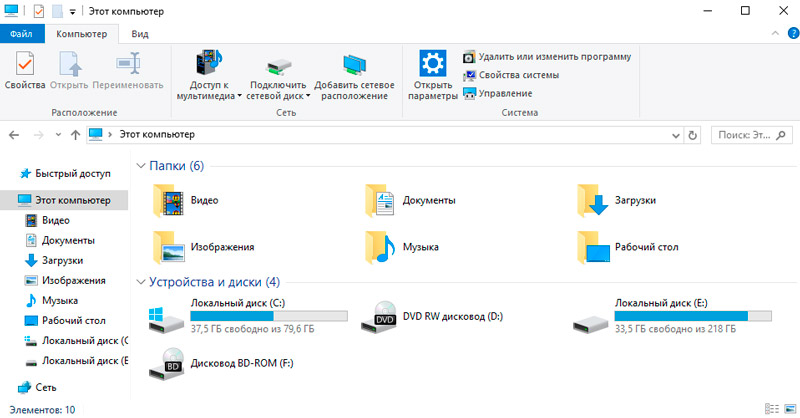
Windows OS has the ability to see hard drives, like solid-state drives (SSDs), as partitions. They are local disks. Physically, one storage can be divided into several.
Moreover, when purchasing new media, it is often not divided, but represents a single volume.
If we talk about why to divide any hard drive into at least two volumes, then everything is obvious. You can just try storing everything within one section. Then it will be downright inconvenient to use it. Yes, it is quite possible to distribute files and data into folders. But when all the information, including photos, videos and the operating system, is located within one partition, if the OS is reinstalled or it accidentally crashes, all this data will be lost.
This is the main answer to the question of why you need to partition your hard drive.
Practice shows that most users have 2 main sections:
- Disk C. Its main task is to store the operating system, as well as a number of programs. Together they do not take up much space, so allocating 50-100 GB for this is usually enough.
- Disk D. This is already a place to store multimedia files, games, etc.
When a separate partition is allocated for the OS, all information that is located in other volumes will remain intact when the operating system is reinstalled.
This is because the partitioning process usually erases the data.
Now the main question concerns how exactly to divide one hard drive into several thematic partitions. There are quite a few solutions for this.
OS installation separation
One of the simplest options for how you can divide your hard drive into different sections. This is done directly during installation, or when reinstalling the operating system.
If you don’t know exactly how to divide hard drives into two volumes, but you can easily cope with reinstalling the OS, then just follow the instructions:
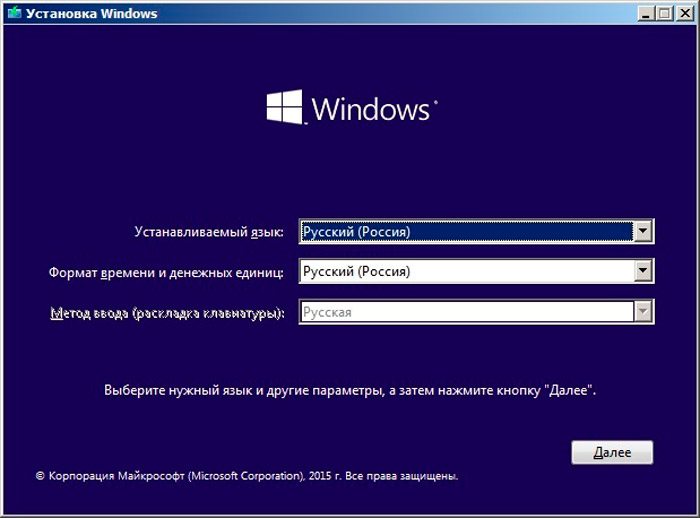
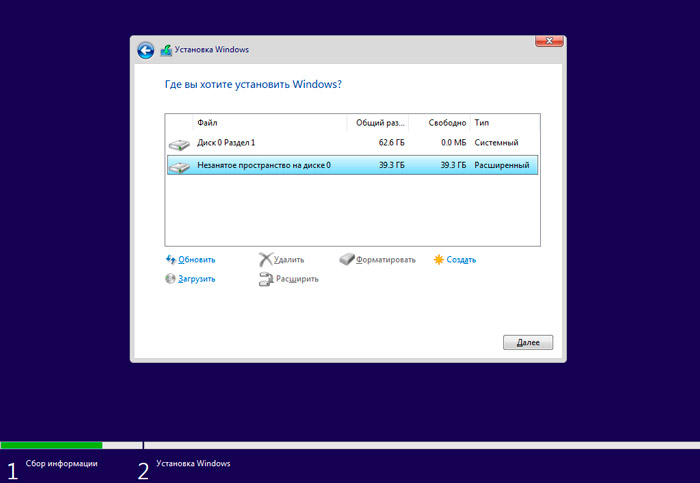
- Begin the operating system installation procedure. You need to get to the point where you need to select the partition in which the OS will be located.
- At this stage, create the required partition and select the required volume. If the total disk capacity is 1-2 TB, it is enough to leave 100-150 GB for the system drive C.
- The computer will then request to allocate another small amount of space needed for backup files. Don’t be too greedy here and click on “Agree.”
- Now the second volume is being formed. Find the line “Free space” and then click on the “Create” button. Select the required volume. You can do the rest. And then on the “Apply” button.
If you need to create 3 sections, then proceed by analogy as with the second volume.
Don’t forget to select partition C as the system drive where the operating system will be installed.
There is nothing complicated about how to divide a single hard drive when installing Windows. This is objectively one of the simplest methods.
The only problem is that not everyone will agree to reinstall the OS for the sake of separation. This is a good option when the need for partitioning coincides with the need to upgrade your current operating system.
You should not think that you can partition your hard drive only when installing Windows 7 or more recent Windows 10 and 8 (8.1). There are alternative solutions, including special software.
If you need to divide your hard drive into several volumes, but you don’t want to or don’t need to do this when installing Windows 10 or other versions, use one of the following methods.
Windows Tools
If you need to split your hard drive into different partitions in Windows 10 or another version, but without reinstalling the operating system, you can use the built-in tools.
There is an integrated utility that works not only in Windows 10, but is also available in Windows 7 and 8, allowing you to partition disks without any problems. Even if they have already been divided before.
It is assumed that the user does not know how to divide the used hard drive into 2 or more parts. In this case, you need to do the following:
- right-click on the “My Computer” icon;
- select “Management”;
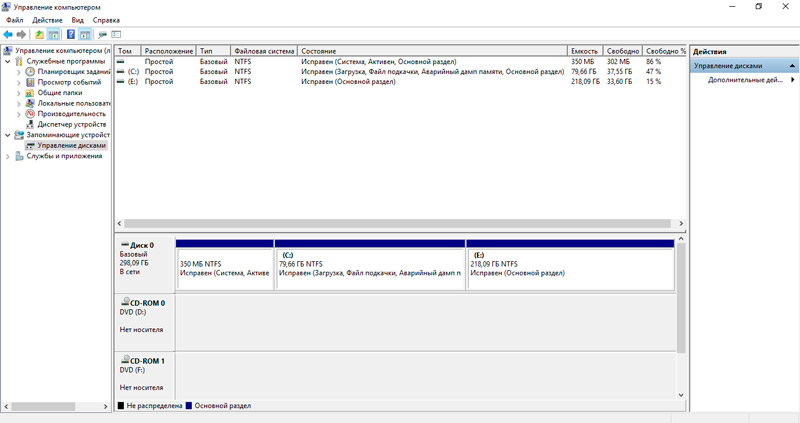
- in the window that opens, go to the “Disk Management” section;
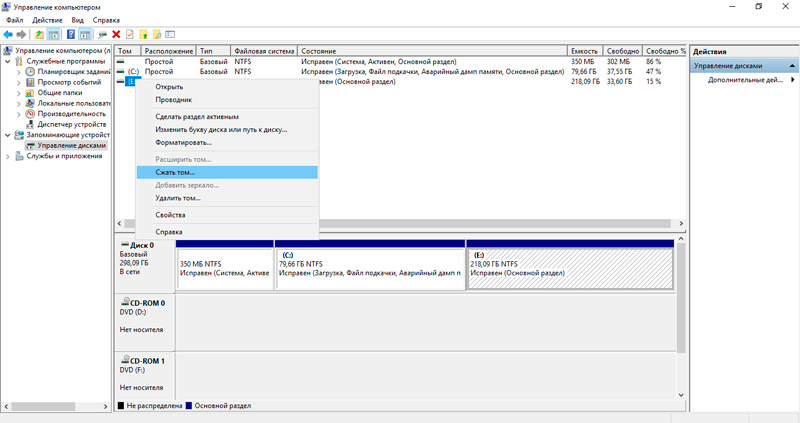
- at the bottom of the window, select the volume for subsequent division;
- right-click on it and press compress;
- allocate free space to allocate it for a new volume;
- confirm the desire to squeeze;
- After this, the amount of available space will be displayed;
- right-click on it;
- click “Create simple volume”;
- Follow the instructions in the Create New Volume Wizard.
There is no need for detailed explanations. Just follow the step by step instructions.
One of the fairly simple options on how to correctly and safely divide the hard drive used on a PC or laptop.
Command line
To divide a large hard drive installed on your computer into several volumes, you can also use the command line.
But objectively, this method looks more complicated in comparison with those already discussed. Although he has every right to exist.
The task is to make 2 volumes from one storage. First, you need to open the command prompt as an administrator by holding down the Win and X buttons on the keyboard and select the desired option.
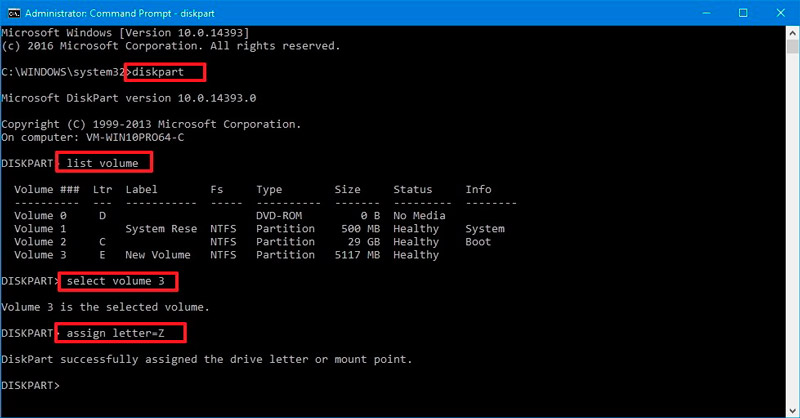
Next, enter several commands:
- diskpart;
- list volume. Remember the volume number on the hard drive corresponding to the system partition C;
- select volume N. Here replace the letter N with the partition number;
- desired shrink=N. Here, instead of N, the amount of memory in megabytes is indicated by which the disk needs to be reduced for partitioning;
- list disk. At this stage, remember or write down the number of the drive where the system partition is located;
- select disk N. Replace the letter N with the number from the previous command;
- create partition primary;
- format fs=ntfs quick;
- assign letter=d. The letter D can be replaced with any other. This will be the title of the new volume;
- Command to exit and complete the change.
You can close the command line after this. Now open the OS Explorer and check if the new partition has appeared.
Sometimes it doesn’t appear right away. In this situation, restart your computer. If after this there is nothing, then there is a high probability of making a mistake at one of the stages. It’s worth trying again, or resorting to alternative separation methods.
Software
Many users prefer to use third-party programs, with which they can easily divide a disk into two or more volumes, as well as use a number of other additional features.
In reality, there are quite a lot of similar programs. It is worth highlighting several of the most popular, in demand and effective.
Each of them has its own instructions on how to properly partition the hard drive being used and allocate different partitions for specific needs.
MiniTool Partition Wizard
A fairly easy-to-understand program that supports all classic operations for working with drives. The software allows you to create, divide partitions, and delete volumes from hard drives and solid-state drives.
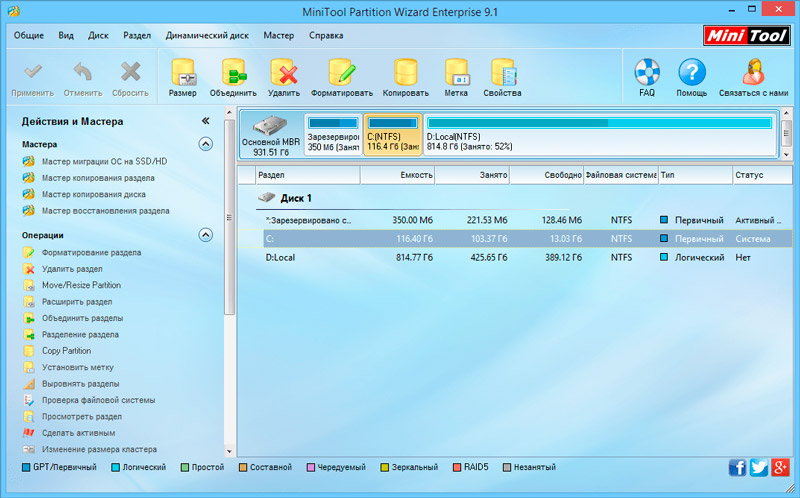
First you need to download and install the program. It is better to do this from the official website of the developers, or through trusted resources. This applies to any software.
Next, the sequence of operations will be as follows:
- run the program;
- right-click on the disk you want to share;
- in the context menu, select Move Resize;
- use the built-in slider to distribute the memory on the disk;
- the value by which the partitioned disk is reduced will become the space of the new volume;
- Right-click on the free disk space;
- select Create;
- a window will appear indicating the free space;
- If everything suits you, click on OK and then on Apply.
Please note that only when partitioning the system disk on which the operating system is installed, after partitioning, the computer is sent to reboot.
AOEMI Partition Assistant
A free and simple utility that allows you to partition, format, delete and move disks. There is nothing complicated in using this software.
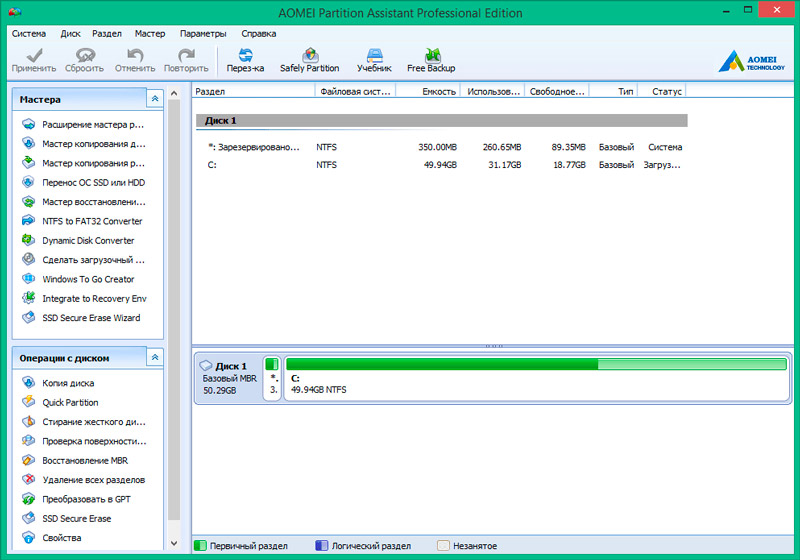
The software itself suggests the sequence of steps. Therefore, even a beginner can handle it. Unlike the previous program, this utility has a Russian-language interface.
The user will be required to do the following:
- run the program and select the disk to be partitioned;
- right-click on it;
- click on “Resize”;
- distribute the space using the slider or by entering numerical values;
- confirm changes;
- when the highlighted free space is displayed, right-click on it;
- click on “Create a section”;
- confirm the size, select the file system and name for the disk;
- click on OK;
- then click on “Apply”;
- wait for the process to complete;
- when asked for permission to split the disk, agree;
- wait for the automatic reboot.
All that remains is to check whether the changes have taken effect.
Acronis Disk Director
Quite powerful software that allows you to create volumes on hard drives. Plus it has additional features.
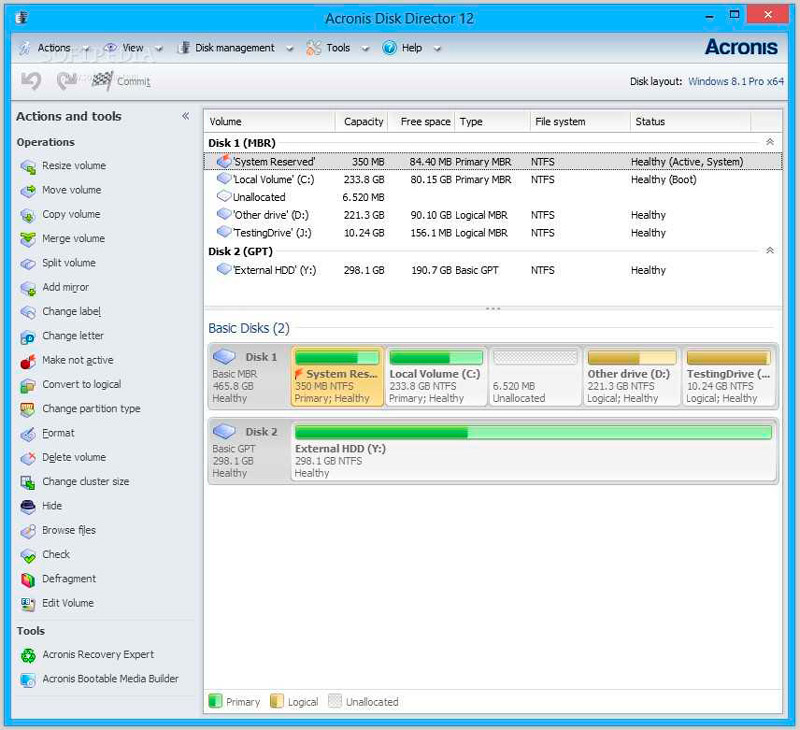
At the same time, the breakdown procedure itself is extremely simple. Necessary:
- run the program;
- select the disk to be edited;
- click on “Split volume” in the right menu;
- set the required partition sizes;
- confirm the changes with the OK button;
- click on the “Apply pending operations” button in the upper left part of the window;
- When asked to restart the computer, give permission.
That’s it, nothing more is required from the user himself. The program will do the rest on its own.
Paragon
The full name of the software is Paragon Hard Disk Manager.
Quite a powerful software development that has a built-in wizard for partitioning disk space.
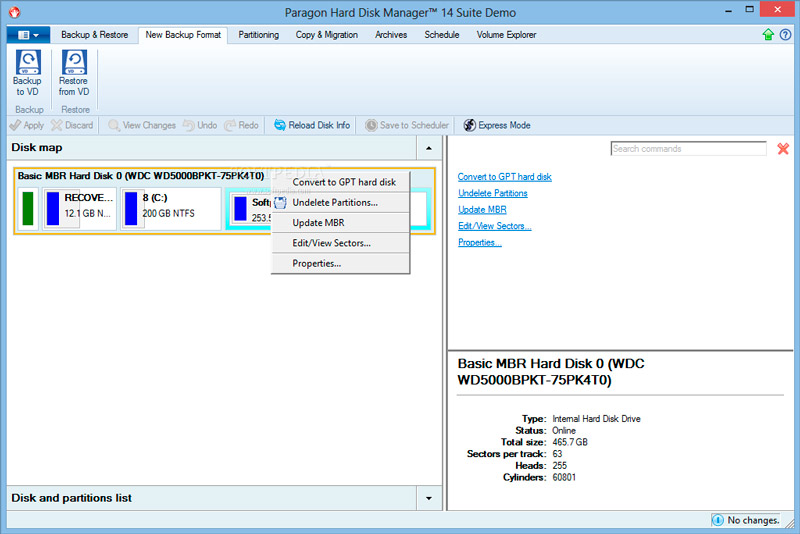
To use this application you need:
- download and install the tool;
- run the program;
- go to the “Operations with Partitions” tab;
- click on “Partition Partition Wizard”;
- select a section to edit;
- use the slider or manually set the necessary parameters;
- Confirm your intentions by clicking on the Finish button.
But for now you have only planned the changes. Returning to the main program window, open the “Partition Operations” tab and click the “Apply” button in the upper left part of the screen. Next, the software will start the process of re-partitioning the disk space. If changes were applied to the system drive, the computer will additionally require a mandatory reboot. After this, the corresponding settings will take effect.
There are a number of other programs that have similar functionality. Each user will decide for himself which of this variety to use.
When partitioning a disk, especially a system disk, be extremely careful. If you make a mistake, you will not only have to reinstall the OS, but also sometimes unsuccessfully try to recover lost data.
Thanks to everyone who read this material to the end!
Subscribe, leave comments and relevant questions, tell your friends about us!
