Each of us at least once thought about how to connect a computer and a TV, to display an image from a monitor on a large screen using HDMI technology or a router. It is not so difficult to do this, there are quite a lot of connection methods: using cables of several formats – HDMI, DVI or VGA, via a Wi-Fi connection to a computer or directly to the Internet.
We will dwell on each of them and learn how to adjust the picture when displaying it on the TV.

Contents
Cable connection
There are several connectors through which the PC and TV are connected. DVI and HDMI cables carry a high quality signal, while using VGA format only gives you an analog image.
The subsequent choice of the cable depends on what sockets are on the equipment – it is important that they match or you can put an adapter on one of its ends.
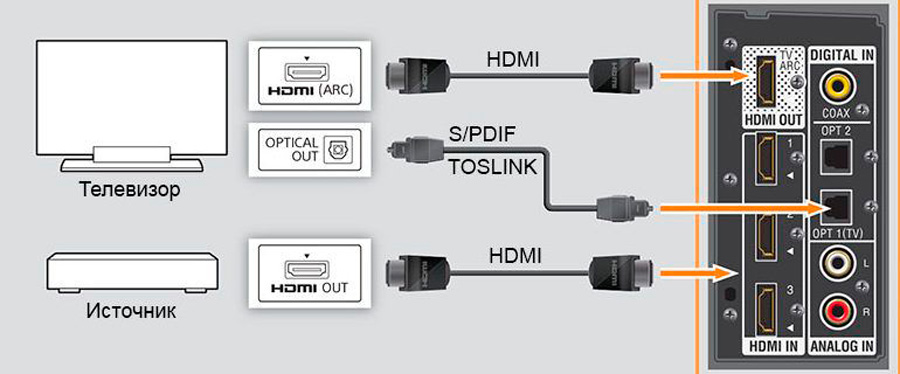
If your computer does not have a built-in HDMI card, or if you are going to connect it to your TV using a different cable format, you need to purchase an audio cable, otherwise you will only get an image. It is connected via an audio jack – a green round hole with a diameter of 3.5 mm. and connects the input on the PC soundbar to the connector on the TV or external speakers. Without such a cable, you will have to listen to the sound through your computer speakers.
VGA connection
This connection format will allow you to see an analog image without sound, which will not be too high resolution, respectively, of imperfect quality. However, if there are no other types of connectors, use this method to connect the equipment.
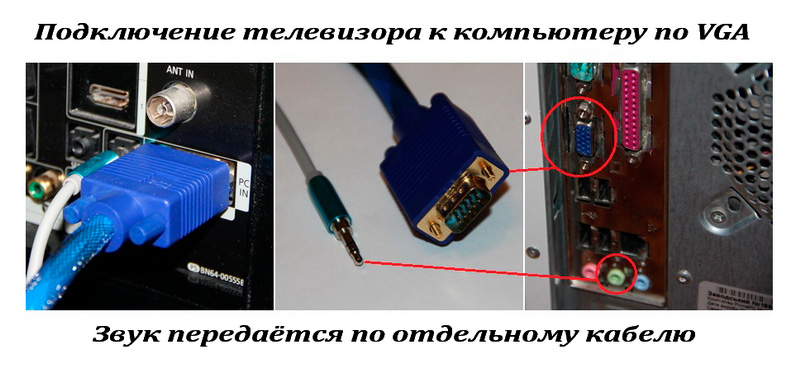
To do this, follow these steps:
- Turn off the computer, connect the equipment with each other using audio and video cables.
- Turn on the TV and select the connection item in the settings (the section may have the name Source or Input), stop at the VGA item.
- Turn on the computer – the desktop image should appear on the TV screen. Another monitor should appear on the computer in the desktop settings.
Video signal input via DVI cable
This connection method allows you to enjoy digital rather than analog images, but still without sound.
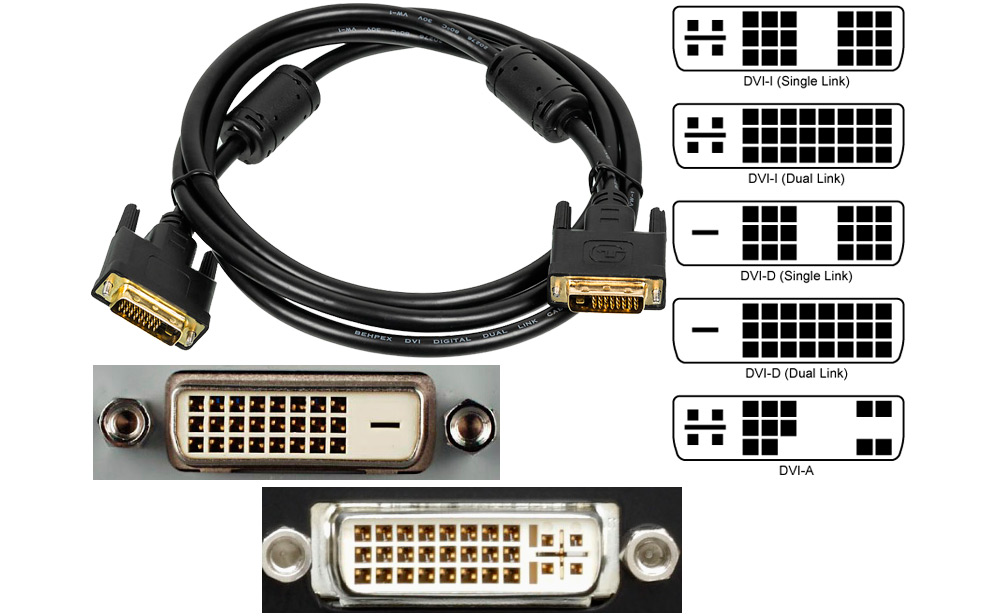
Please note that there are different types of cables of this format, do not make a mistake when choosing and subsequent purchase. In general, the connection between the PC and the TV is established in the same way as in the previous method, only select the DVI format in the video signal reception settings.
HDMI connection
This method of supplying video and audio signals to TV is the most relevant and profitable today, because you will receive a high quality digital signal with sound – provided that your computer has a built-in HDMI card. Modern video cards and laptops are usually equipped with such a connector.
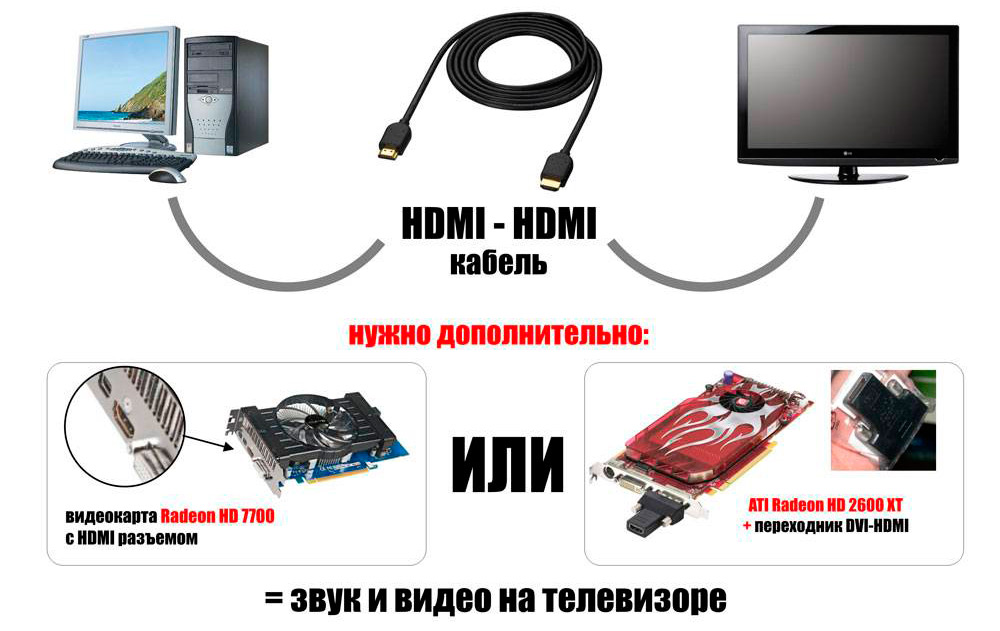
Using this connection, you can display a picture on a large diagonal screen without loss of quality, which will especially appeal to fans of cinema and various games.
When buying an HDMI cable, take into account the location of the equipment in the room – if the screen is located on the wall, you will not be able to simply insert a straight plug, since the cable is quite thick and stiff. There are a variety of cables where the plug is angled or angled to fit well between the back of the TV and the wall.
The connection is done like this:
- Turn off the equipment from the network, connect it with a cable through the HDMI connectors.
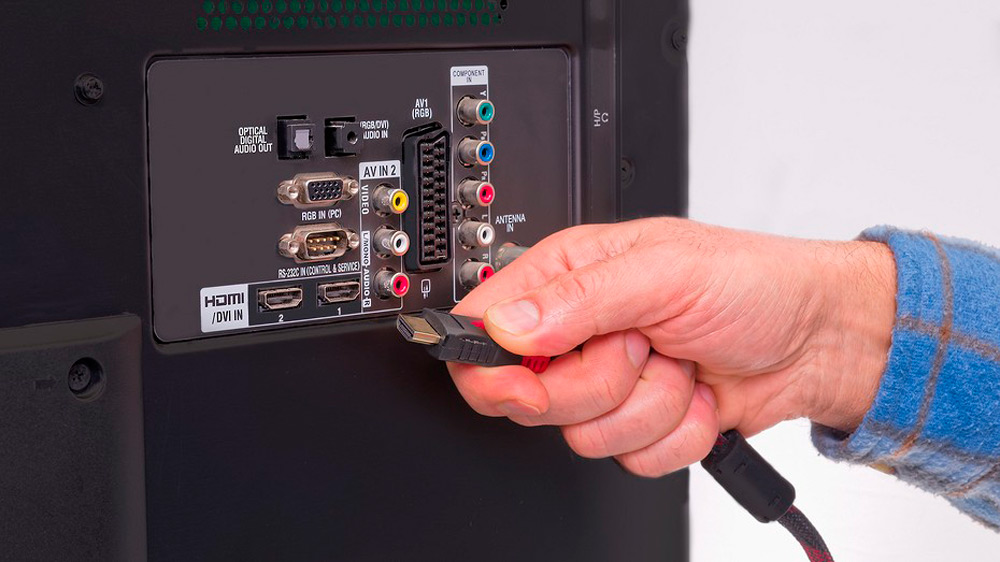
- Turn on the TV, in the connection parameters (Source or Input) select the required connection type.
It happens that one HDMI port on a TV is not enough, and to solve the problem there are switches – “hubs” that allow you to connect several devices to it at the same time.
S-Video cable connection
Connecting a TV to a PC using this type of cable is currently not often used, due to its irrelevance, as well as the availability of more modern and effective options. This analog output is found on old-style video cards and on video cards intended for video editing. Such a connection is capable of reproducing an image of not the best quality, but in some cases this is the only available method.
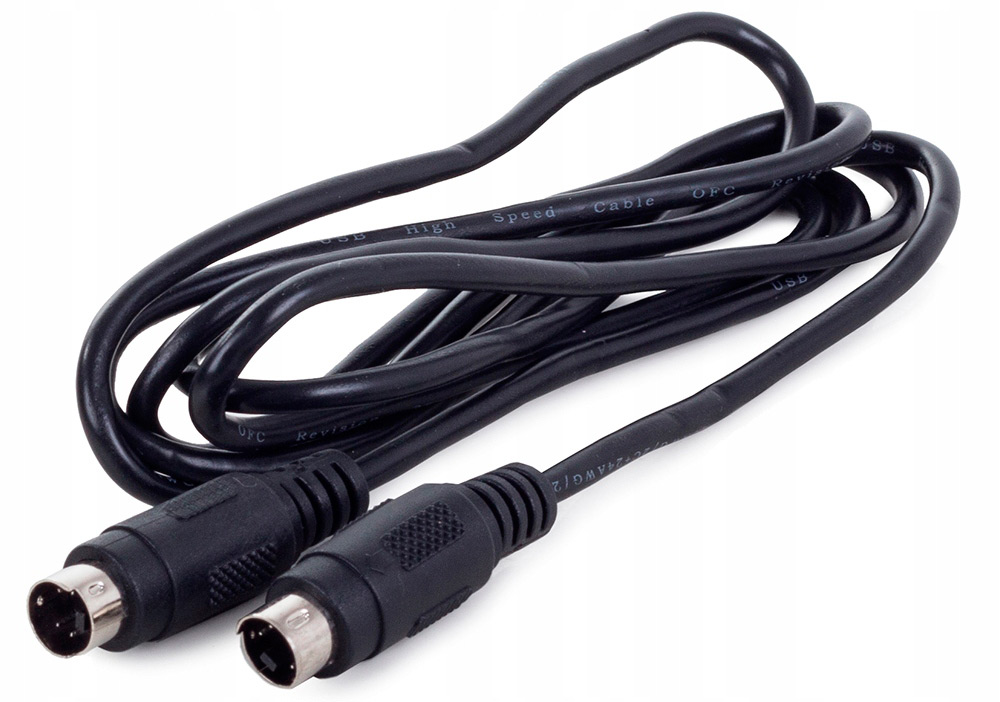
The connection process is almost identical to those described earlier in this article. First of all, disconnect the TV and PC from the network, and then connect the necessary connectors. Then turn on both devices and select the corresponding video input on the TV if it was not automatically detected. Upon completion of these manipulations, the picture should be broadcast on the screen.
RCA and Scart
Some cable options, in particular RCA and Scart, can only be used in conjunction with special converters. This is due to the fact that there are simply no such outputs on a PC.
Most older TVs are often only capable of receiving RCA signals. This cable consists of three colored wires: two for audio, one for video. People also call them “tulips”. But in order to make such a connection, you must additionally purchase a special adapter. It can be HDMI → RCA or VGA → RCA.
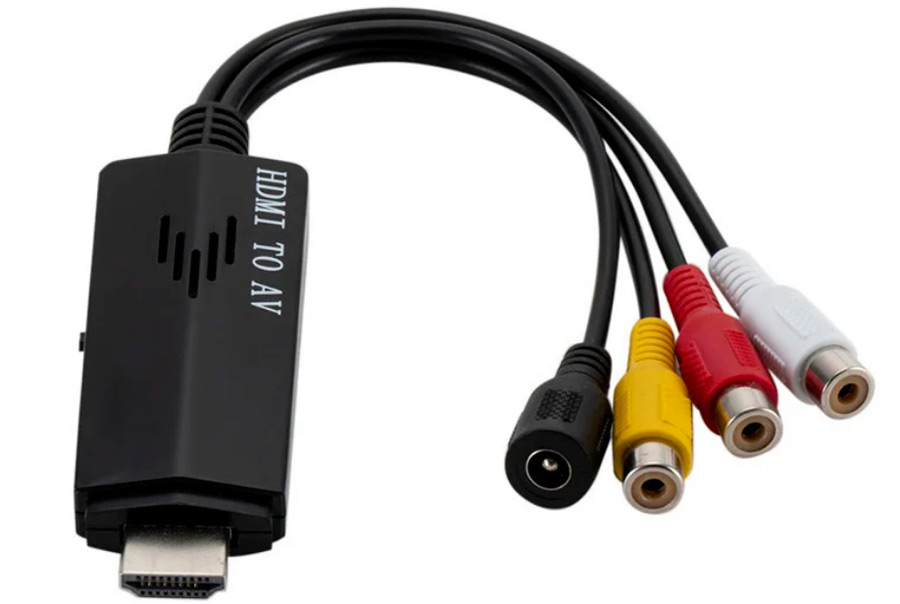
The relatively modern Scart connector allows high-definition image transmission. What’s more, it can play both video and audio format at the same time. Unfortunately, there is no such connector on a computer. Therefore, again, you will have to resort to buying adapters.
Connection setup proceeds according to the same principle as in similar methods.
Image Adjustment
After connecting the equipment using one of the above methods, you need to adjust the image. Do the following:
- In the context menu of the desktop (it can be turned on by the right mouse button) open the item “Screen resolution”.
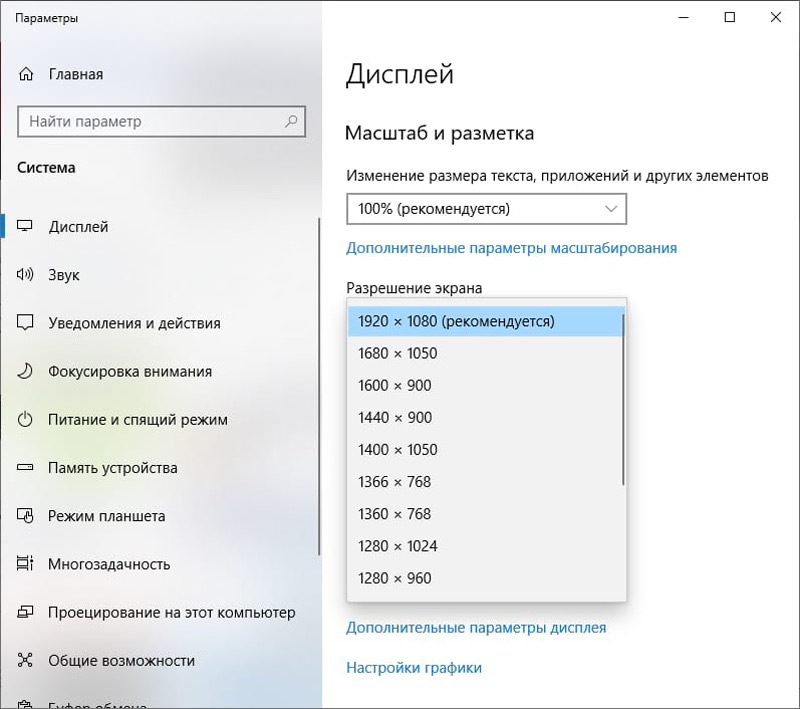
- In the Display section, the “Multiple monitors” line is selected if you connected a TV and did not disconnect the computer screen.
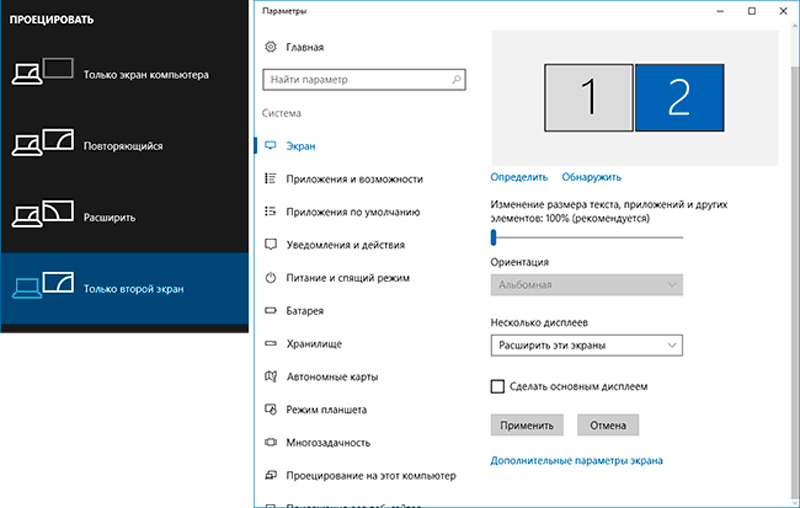
When setting the resolution, stop at the highest value for the greatest clarity of the picture, but keep in mind that the higher the value, the smaller the icons will be.
Sound setting
As you can see, not every cable, together with the image, transmits an audio signal. For this purpose, another one is needed – with a Minijack connector at one end and with two audio cinchips (RCA) at the other.
The Minijack plugs into the headphone jack (green) on the PC. Usually there is a designation on the case. And “tulips” (red and white) are connected to the corresponding ports on the TV.
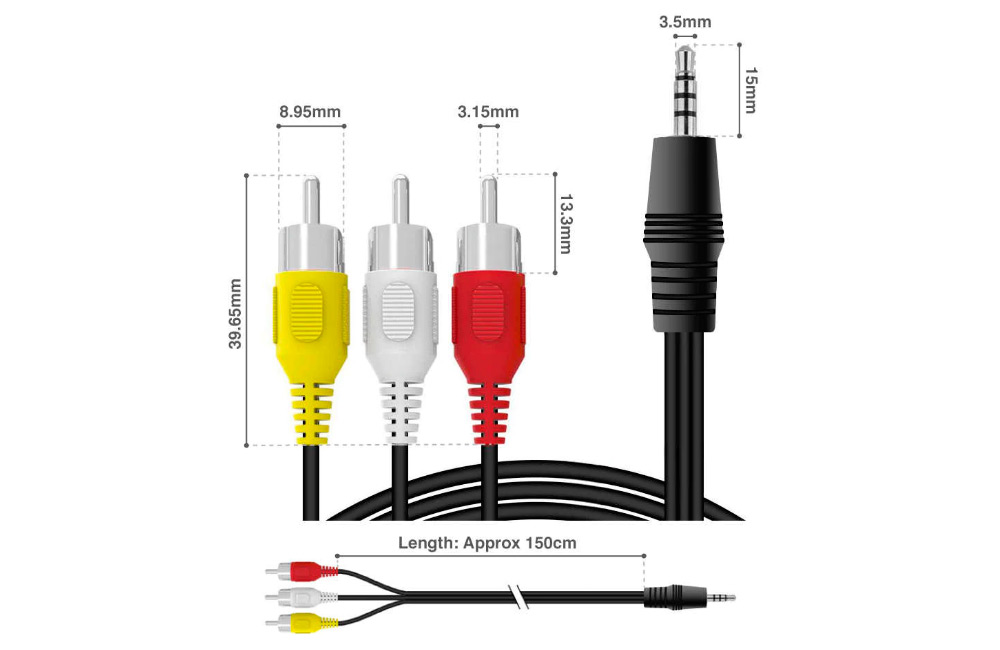
It is also necessary to make a small adjustment in the computer parameters. This is done very simply. Right-click on the sound icon located in the notification area and select “Playback Devices”. Next, in the list provided, find the name of your TV, right-click on it, and then click on “Set as default”. Save the changes with the “OK” button.
Working with multiple displays
You can use multiple monitors at the same time as follows:
- The duplication mode is a complete coincidence of the image on both the PC and the TV – your actions are visible on all monitors connected to the system unit.
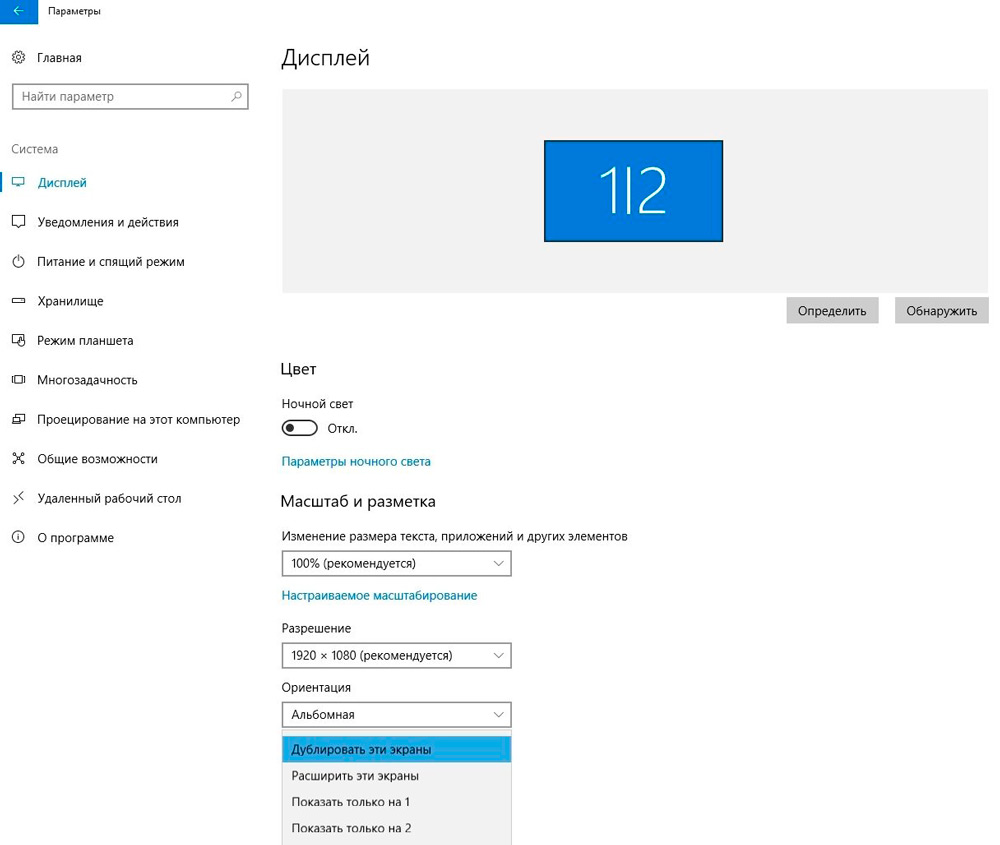
- “Expansion” – a mode for combining two screens so that each of them is independent.
To change the resolution on an individual device, select it through the “Screen” item and make the necessary settings.
Using a network cable
In addition to the above methods, a computer and a TV can be connected to view videos or photos on a large screen using a Wi-Fi router. This requires a LAN port on the equipment and a network cable, after which a special media server is installed.
It all happens like this:
- Connect the TV to the router using a network cable to the LAN jack and install the media server on it using the following steps.
- Download a program to broadcast data from a computer – most users choose the Home Media Server utility.
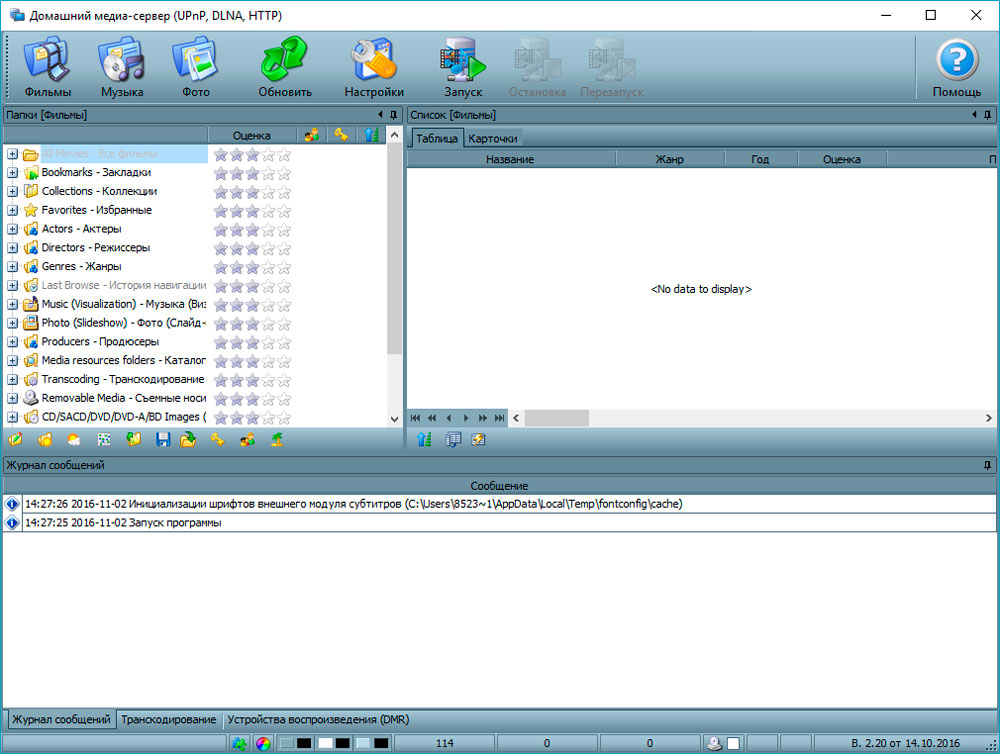
- After installing the program, select your TV in the menu of its settings, then mark the sections on the PC that you would like to view on it.
- Run the program.
- Turn on the TV, select the Source section in the parameters, after which a program will appear in the list through which you can view files from your computer.
In a similar way, two devices are connected directly through the LAN ports – on one side, the cable is inserted into the TV jack, the other end is connected to the same port on the back of the system unit, creating a network connection.
To combine the technique when using the above two methods, you need to set the DHCP network settings on the TV. If they are not automatically enabled, you should manually register the following data:
- In the operating system: go to the Control Panel, open your network and view its properties – select Internet Protocol 4 and write the IP address 192.168.0.1, the subnet mask – 255.255.255.0. The DNS server combination is the same as the IP value.
- We enter this data in the network settings of the TV.
If you followed the instructions, but the picture did not begin to duplicate, we recommend that you check the Ethernet cable (patch cord), which can be either “direct” or “reverse” (so-called crossover). Modern network cards can often work without problems with each of them. However, for older designs, the “straight” option is not always suitable.
To avoid mistakes during the setup phase, we advise you to use the “Configuration Wizard”, which is present in most TV models, and just follow the step-by-step guide.
There is also an alternative way for those who failed to start the broadcast using the above steps. After connecting both devices to the local network, select any file (or folder with media files) on your computer and right-click on it. In the list that opens, click “Transfer to device” (there may be other similar variants of names) and click on the one you need. A prerequisite is that at this moment the TV is turned on and is on the network. So, without any settings and additional utilities, you can quickly set up a video stream.
Wi-Fi connection
Modern models of TVs with Smart TV function have a built-in Wi-Fi module, which is useful to you in order to connect the device to your PC and display the image on the screen.
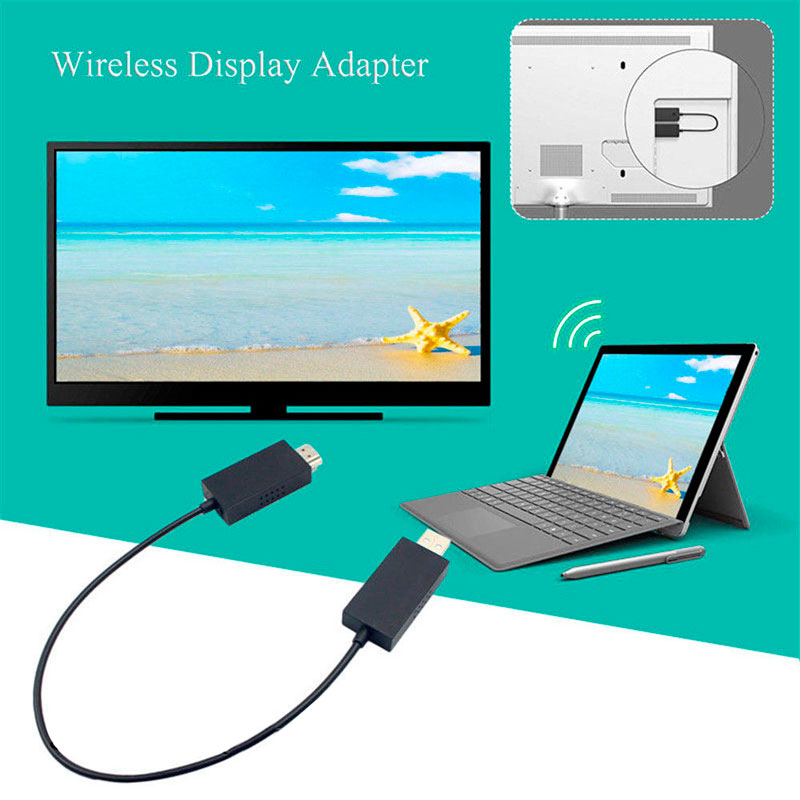
To do this, connect to a wireless network through the hardware parameters, connect to this network on a personal computer. Now, through the Control Panel, go to the screen menu, turn on the search for monitors in the resolution settings window. When the computer detects all the monitors, you can stream your desktop to the big screen. To do this, both the computer and the TV must support Wireless Display (WiDi) technology and must be turned on.
If the TV supports Miracast technology or a special set-top box is used, then on the computer it is enough to install some application for broadcasting to the TV via Wi-Fi, for example, the EZCast utility. After that, it is enough to connect the TV and computer to the same Wi-Fi network so that they can work together as if connected with a cable.
All the described connection methods will allow you to transfer the image from the computer screen to the TV. In principle, combining equipment using an HDMI cable is one of the most attractive and logical options, since this signal transmission format will allow you to get a high quality picture with clear sound. But the choice of the optimal method depends on the parameters of the technique and which of the listed options will be most convenient for you.